35+ Cap-tivating DIY Projects Using Old Bottle Caps
Nobody likes throwing away something that can still be useful, especially when it comes to those pesky bottle caps. Be it a plastic or glass bottle, you’re always stuck with a cap at the end. But if you thought all these little lids were suitable for cluttering up the recycling bin, think again. Get creative with them instead—turn these often-discarded items into eye-catching projects and have fun while doing it!
In this article, we’ll explore some awesome ideas for reusing bottle caps in cool and unique DIY projects. From keychains to lampshades to art, there are dozens of creative ways to repurpose plastic and metal bottle caps. So get ready to rummage through your recycling bin, because today is the day you turn your trash into something extraordinary!
Disclaimer: Exercise caution when poking holes in the caps.
Decorated mirror frame
If you’re looking for an artsy way to spruce up the walls of your home, assembling a decorated mirror frame using old bottle caps could be the perfect project! While it may seem daunting at first, this gorgeous wall accent is a rewarding DIY project.
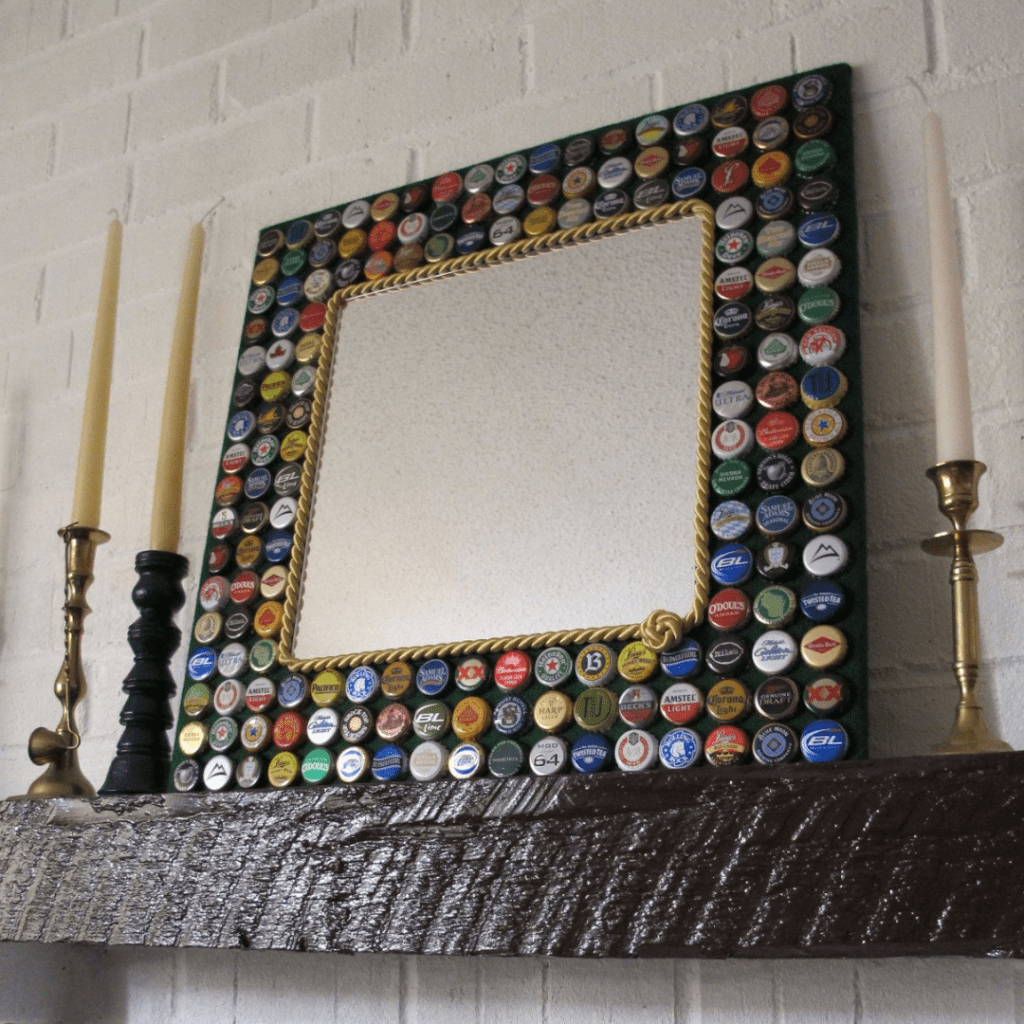
First, select several different styles of bottle caps that complement each other. Once you have chosen the caps, lay them out in the pattern you want. You can make it as stylistic or random as you want! Then, one by one, glue them onto the mirror frame.
Chakra trivet
For a fun and impressive DIY project that utilizes bottle caps, consider making a chakra trivet! By painting symbols (e.g., eyes, suns, and moons) over the caps and then sticking them together in an aesthetically pleasing design, you can create a unique conversation piece for your kitchen.
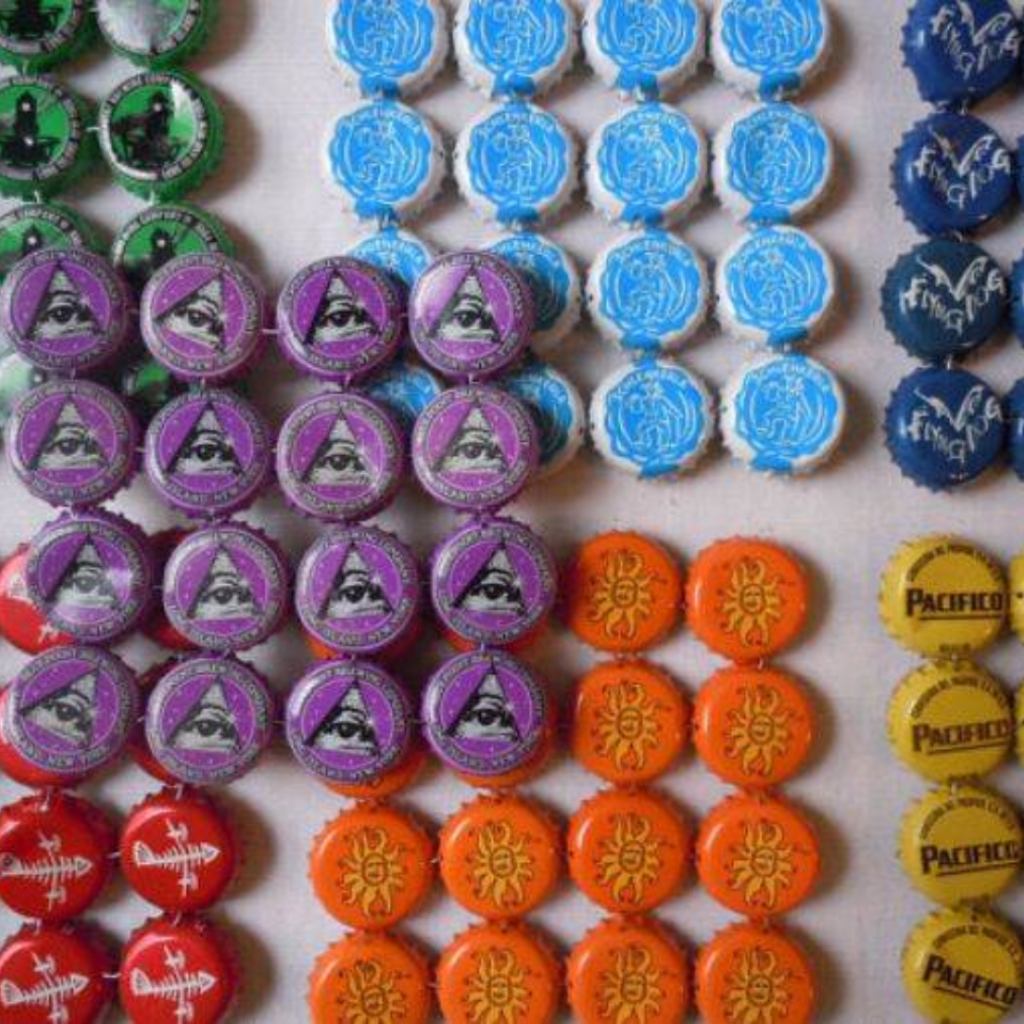
To connect metal caps with loops or wire, use a hammer and a nail to punch a hole in the caps. Wear gloves and goggles for extra safety, and work on a piece of scrap wood. Don’t worry; it’s a safe project, but a little extra safety never hurt anyone.
Propeller for flower pot
If you’re looking for a creative and unique way to spruce up your flower pots, why not assemble a little propeller made out of your trusty old bottle caps? Start by hammering down the rims of each cap to create a flat surface.
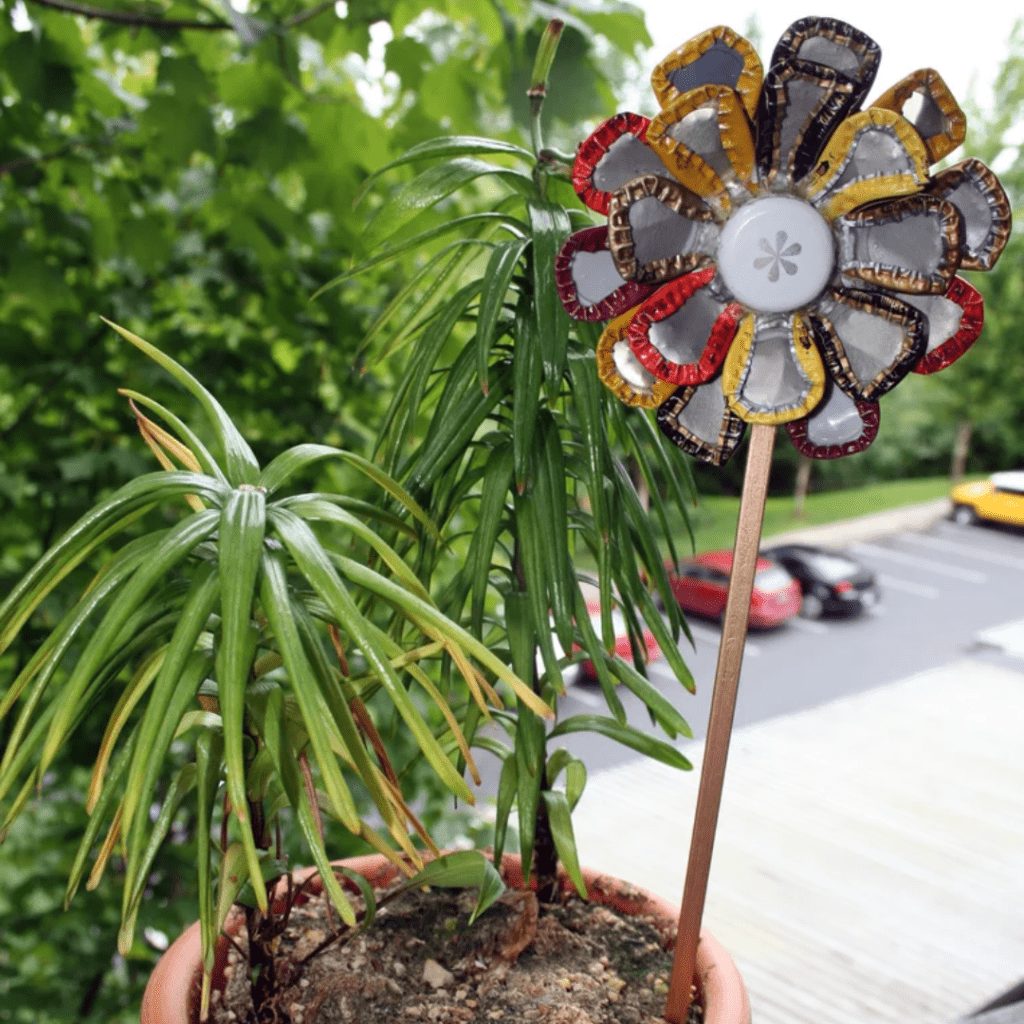
Arrange them in a flower shape and glue them onto a stick. Once the glue has set, just insert it into the soil inside the pot. It gives an extra decorative touch and shows off your upcycling skills—which pairs well with being a plant parent.
Cap letters
Who knew that your old bottle caps could be transformed into modern art? You can make this using either wood or cardboard. Either way, start by penciling out the shape you want for your piece. You can make them as big or small as you want.
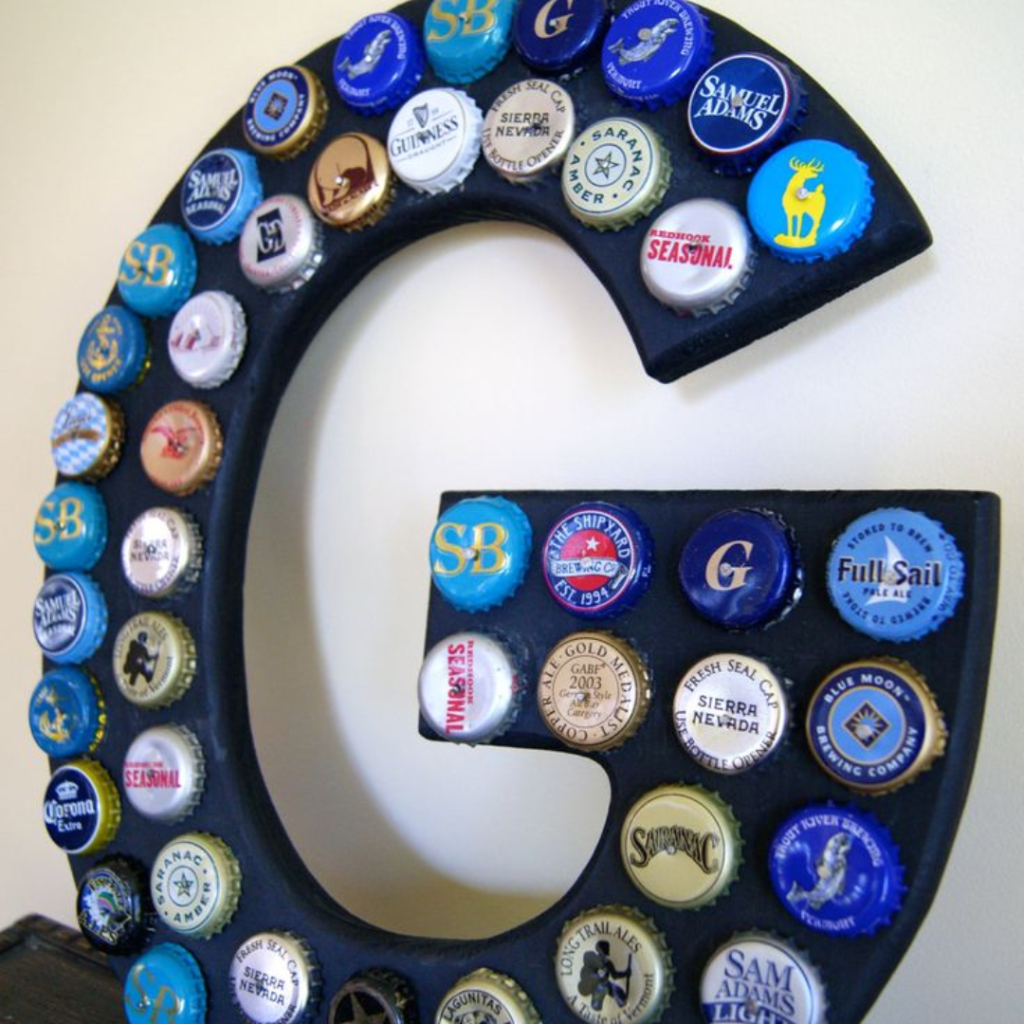
For cardboard, you can easily attach the bottle caps with some glue. Ensure you apply enough glue per cap so that they stay put. If you’re going for something more sturdy, wood is a good option. Just nail those caps in place and step back and admire your handiwork.
Christmas tree ornaments
If you’re looking for an inexpensive, creative way to spruce up your holiday decorations, look no further than old bottle caps! A few supplies and a bit of imagination can turn ordinary bottle caps into festive tree ornaments that will surely bring a smile to everyone’s face.
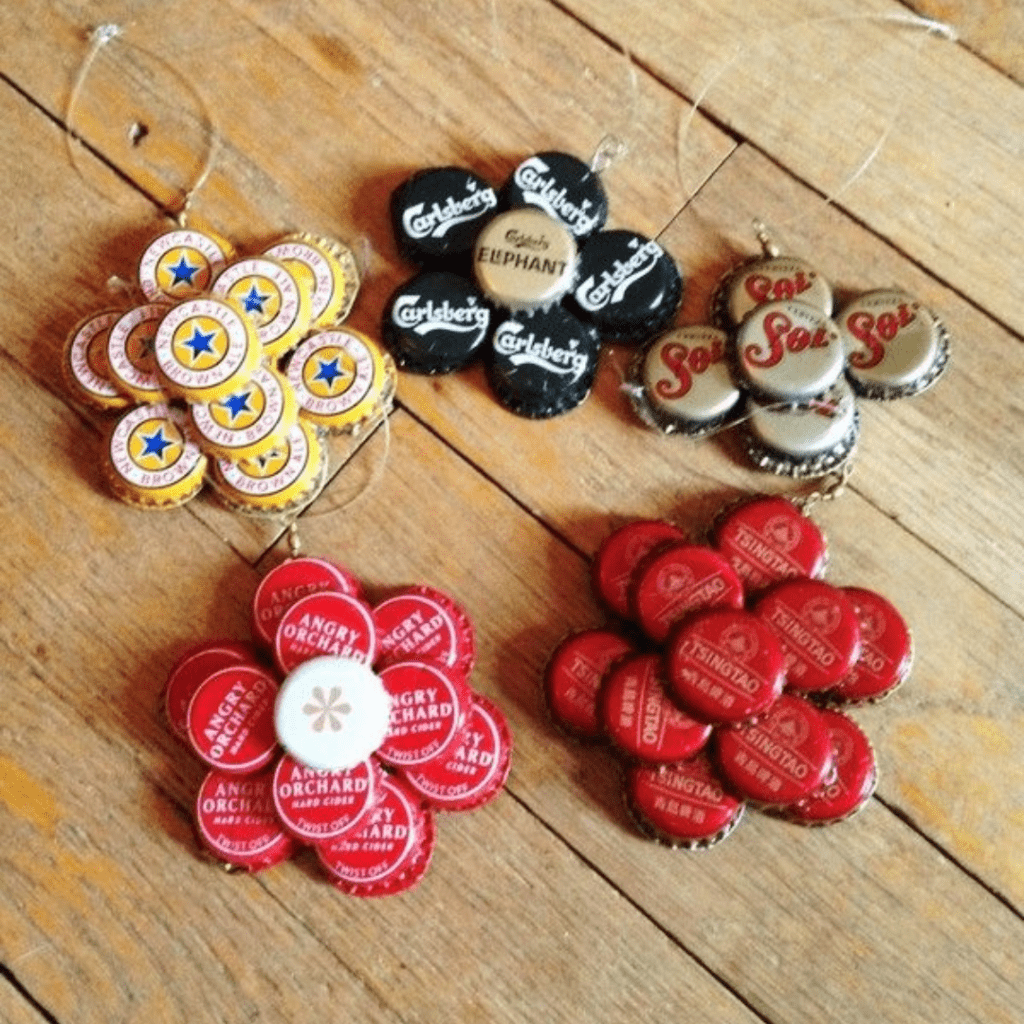
Grab some lightweight craft wire. Now cut a piece of the craft wire and slide it through holes punched in each cap. Finish using gardening twine or thread to create loops for hanging onto Christmas tree branches and then embellish with ribbons, bows, bells, etc.
Cute jewelry
If you’re looking for an exciting and creative way to repurpose bottle caps, why not turn them into super cute jewelry? You can mix and match them however you like! For this, you’ll need some basic DIY jewelry supplies, like jump rings and earring hooks.
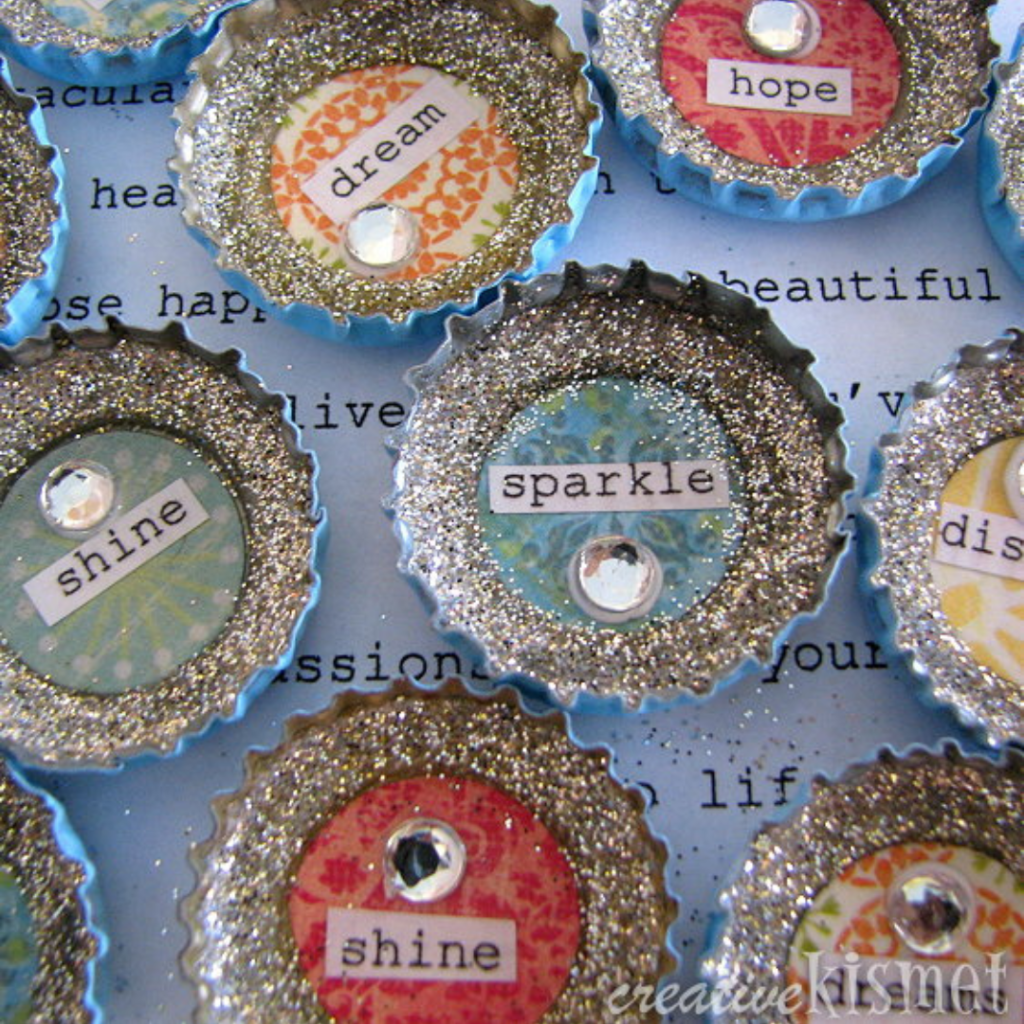
You can add accents with an assortment of beads that coordinate with the colors. Use pliers to twist both edges of wires securely around each other until they form a loop. Next, attach any coordinating beads or dangly charms onto opposite sides.
Create a map
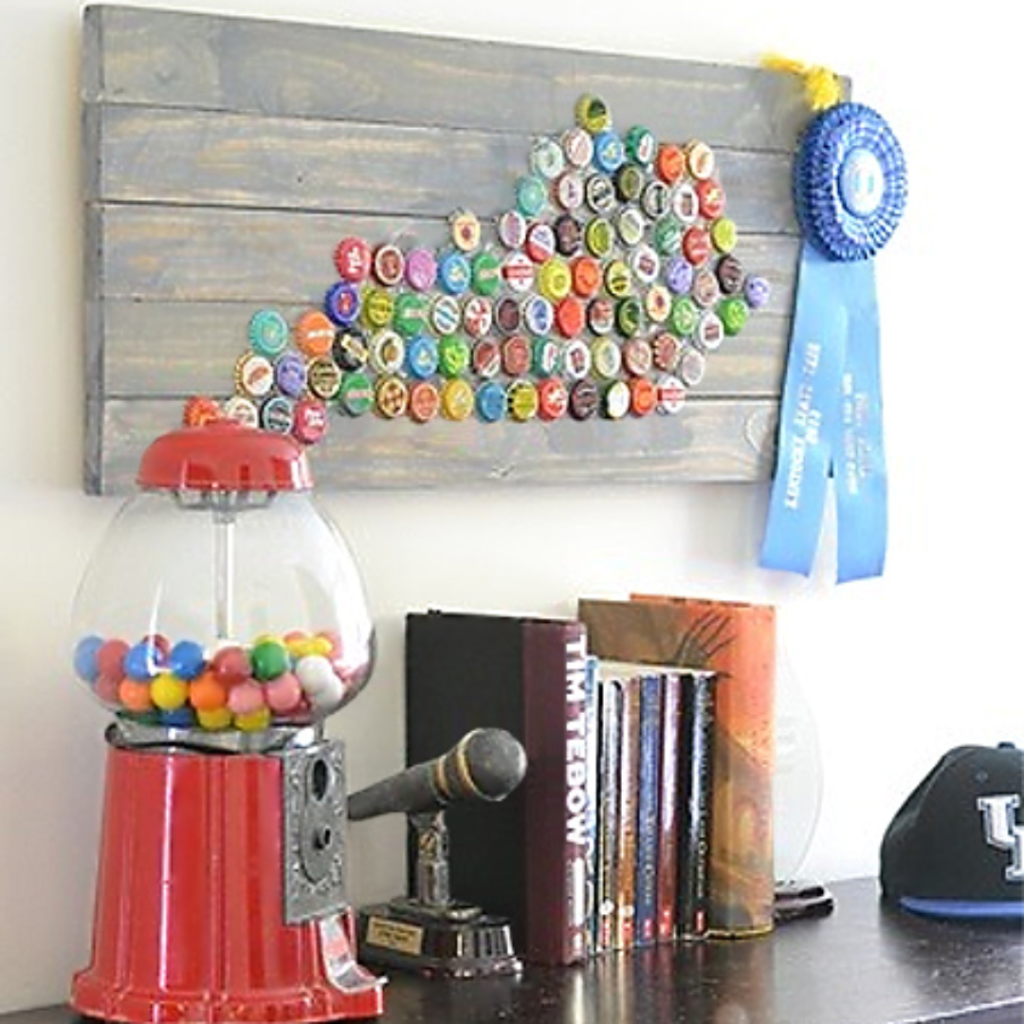
Turn those bottle caps into a unique map to decorate your home, office, or classroom. All you need is a bit of patience, but assembling the caps into a geographical shape can be a fun challenge. Start by outlining your desired shape on the base material.
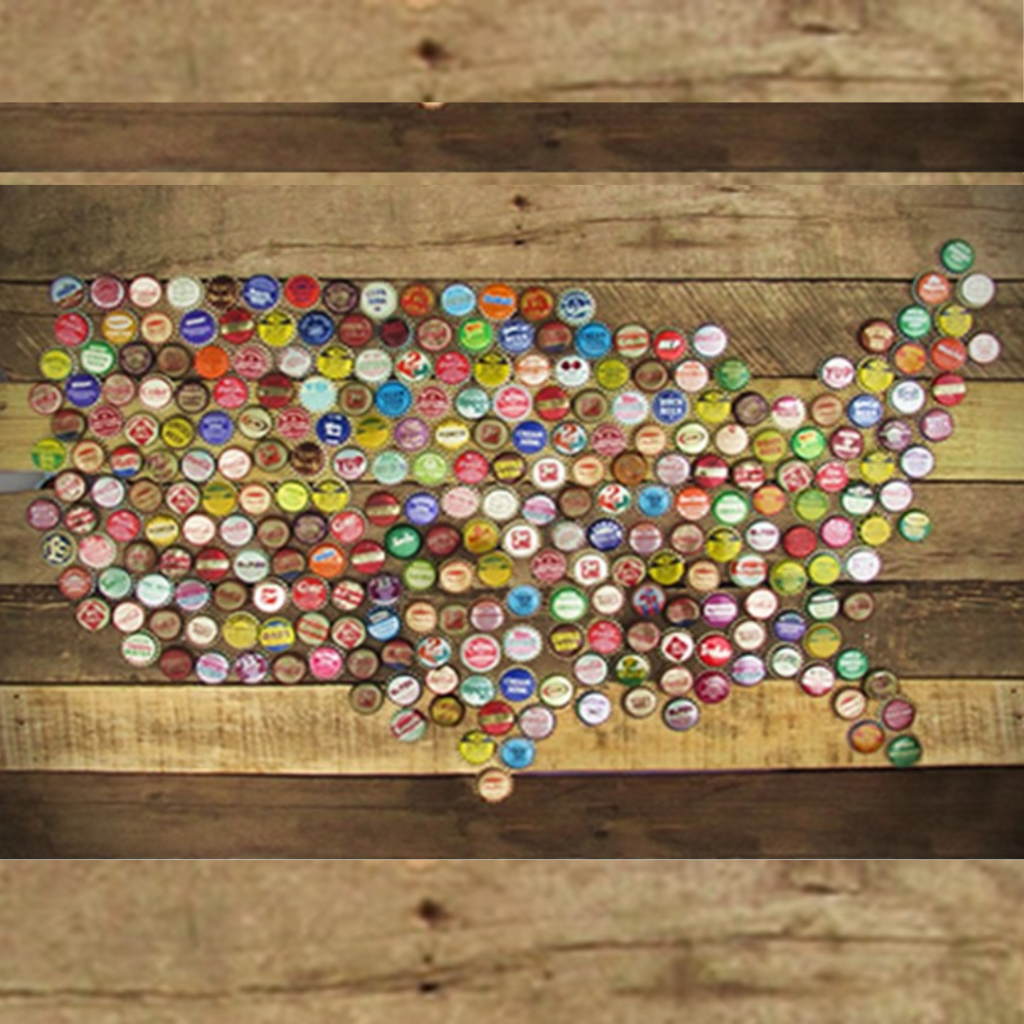
Then start building the frame around it with the glued-on bottle caps—they should fit snugly together so that you won’t see any gaps once all of them are in place. You can add flair by using bottle caps from each location on the map.
Flower greeting card
Crafting a flower greeting card out of bottle caps may seem impossible, but with some creative thinking, it’s entirely doable. You only need some cardboard or thick paper, several different colored bottle caps, paint and paint brushes, and some glue.
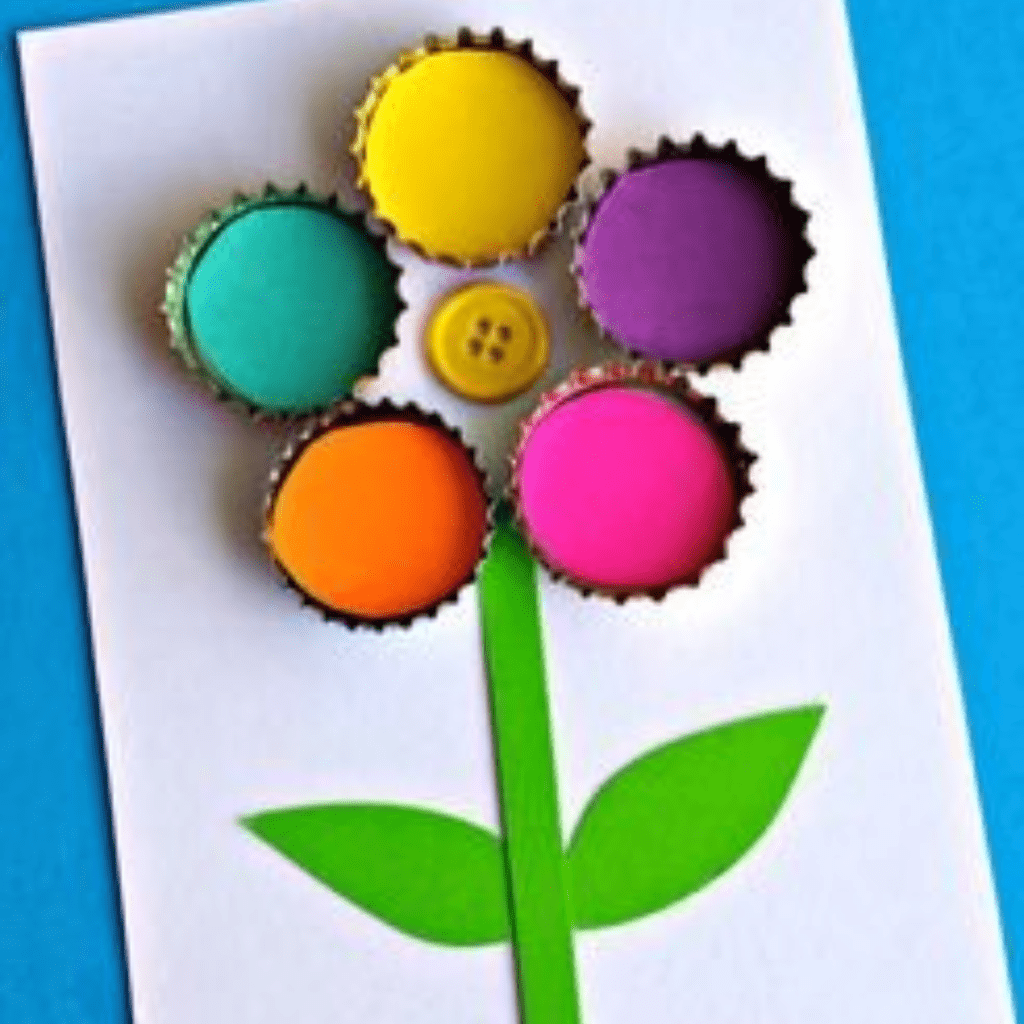
First, draw the outline of the flower onto the cardstock. You can be as detailed or abstract as you want. Next, lay out the bottle caps for the petals, getting them snuggly next to each other. The ridges of metal caps can help you align them perfectly.
Decorate the Christmas tree
To get started, print out family photos. To make it easier, print them as circles 1 inch in diameter—that will save you the trouble of cutting off any parts of the picture. Make sure you have more caps than pictures.
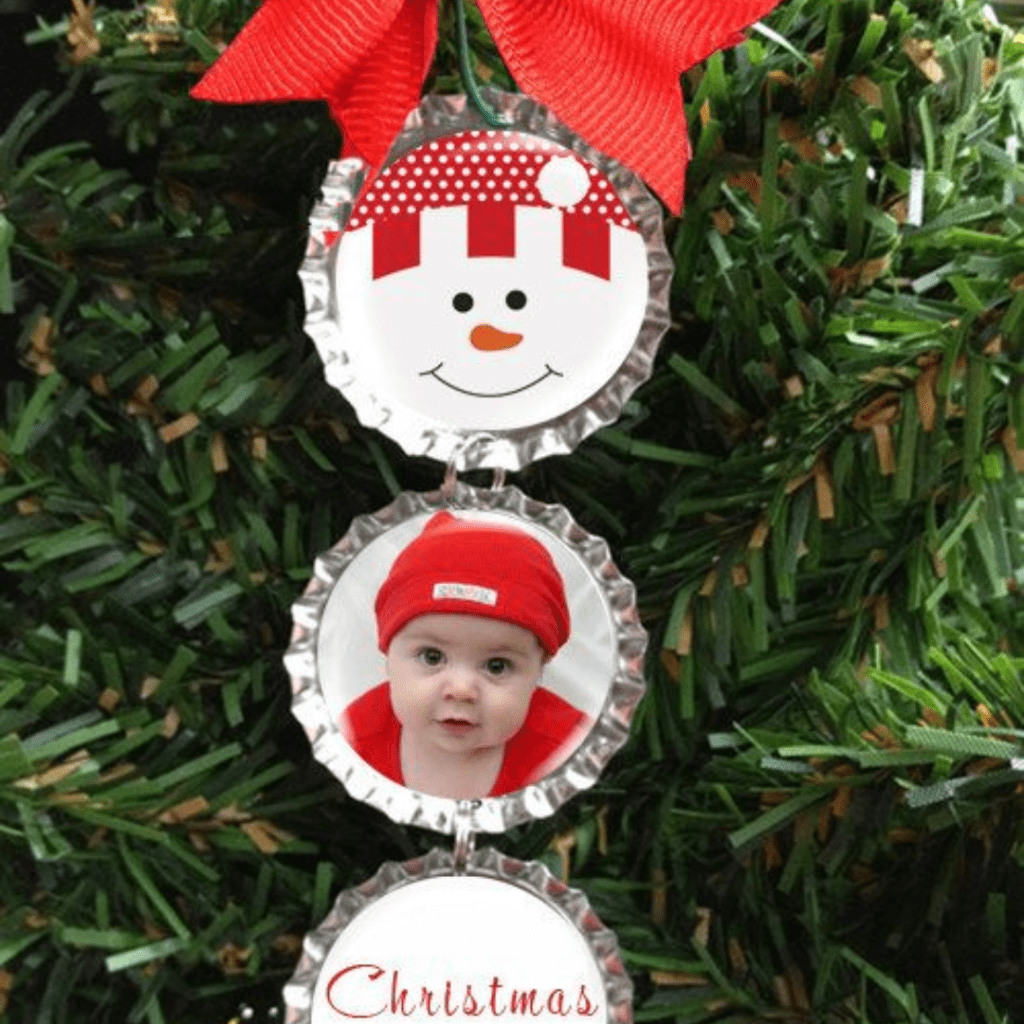
Punch holes in the caps before you glue everything. Once that’s done, glue photos and decorations like holiday-themed pictures and elegant writing to the inside of each cap. You can also fill in those extra caps with bits of foliage for an extra festive vibe.
Beautiful curtain design
This one is the most time-consuming craft yet, but it’s certainly worth it. You can turn boring old bottle caps into a fun curtain. Just think of how cool your room will look with this unique take on the classic bead curtain!
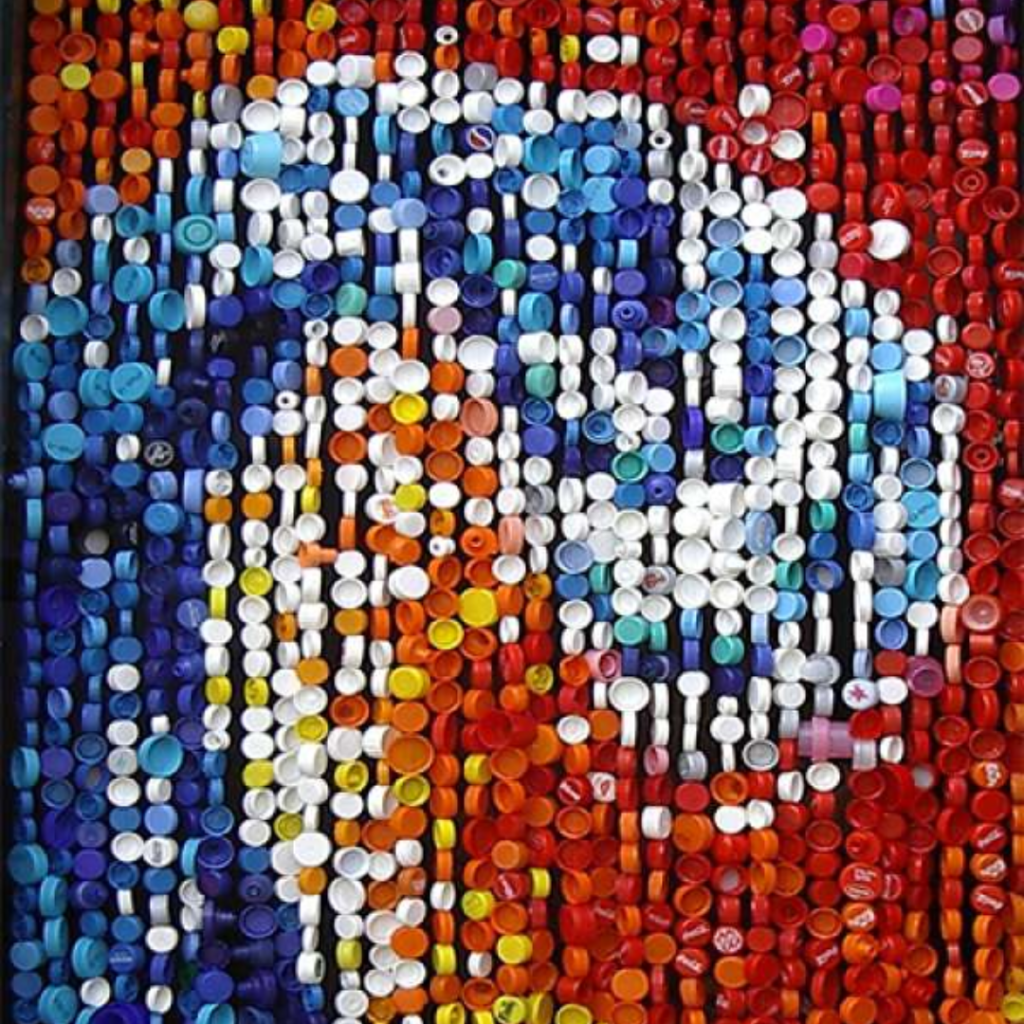
All you have to do is weave thin strands of wire or twine through the holes in each cap. Then, when enough caps have been weaved together, attach them to a curtain rod. You can use different colors and patterns to create whatever design your heart desires!
Tic tac toe game
This is a great way to recycle old bottle caps and create a fun game for your family. All you need are some paper, paint, and bottle caps. Start by painting a set of five Xs and a set of five Os onto bottle caps.
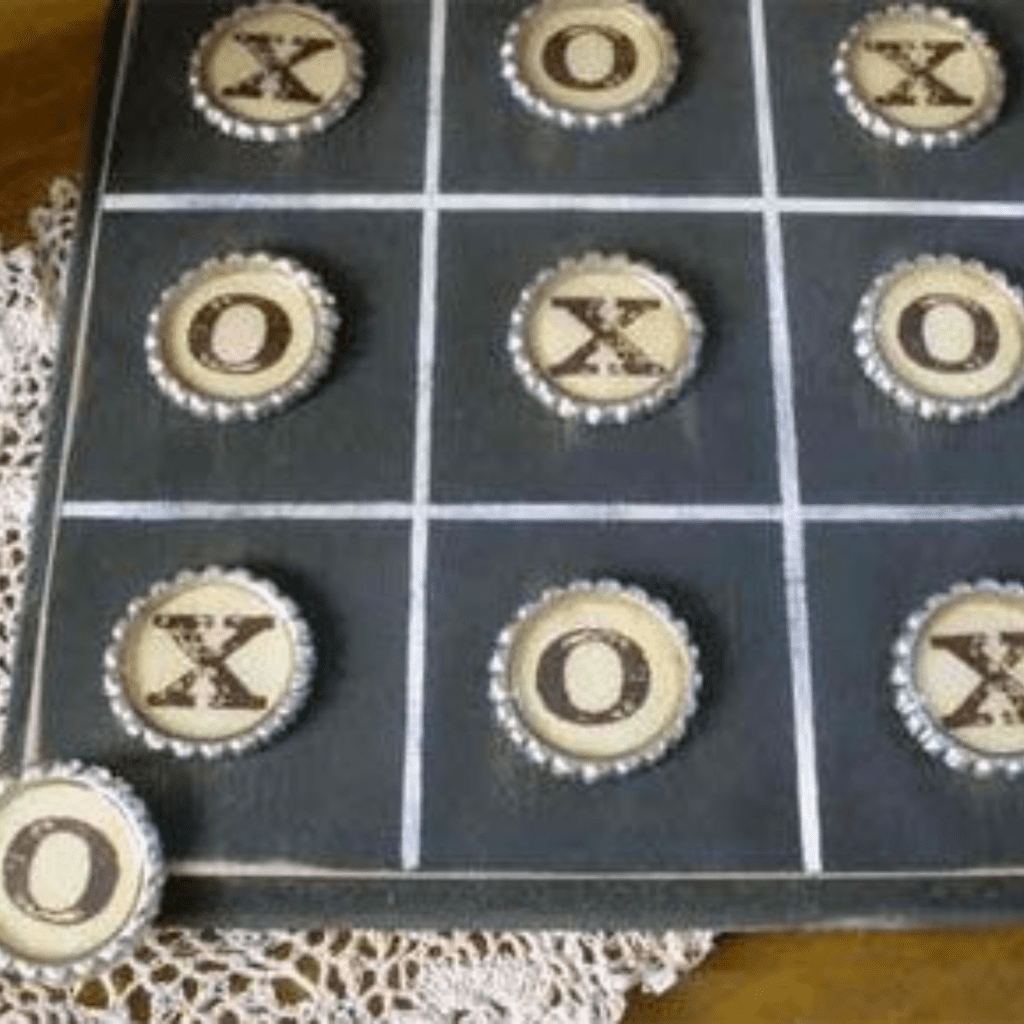
You can design them as simple lines, or use colors to make them pop. Once they have dried, use a sheet of paper or cardboard to draw out the tic-tac-toe board. Now you have a lightweight gameboard for home or on the go.
Protective kitchen backsplash
To get started, collect some clean, unused bottle caps of different colors, then use strong glue or epoxy adhesive to securely attach the bottle caps onto your backsplash. Depending on how intricate you want it to be, you may need anywhere from several dozen to over a hundred bottle caps.
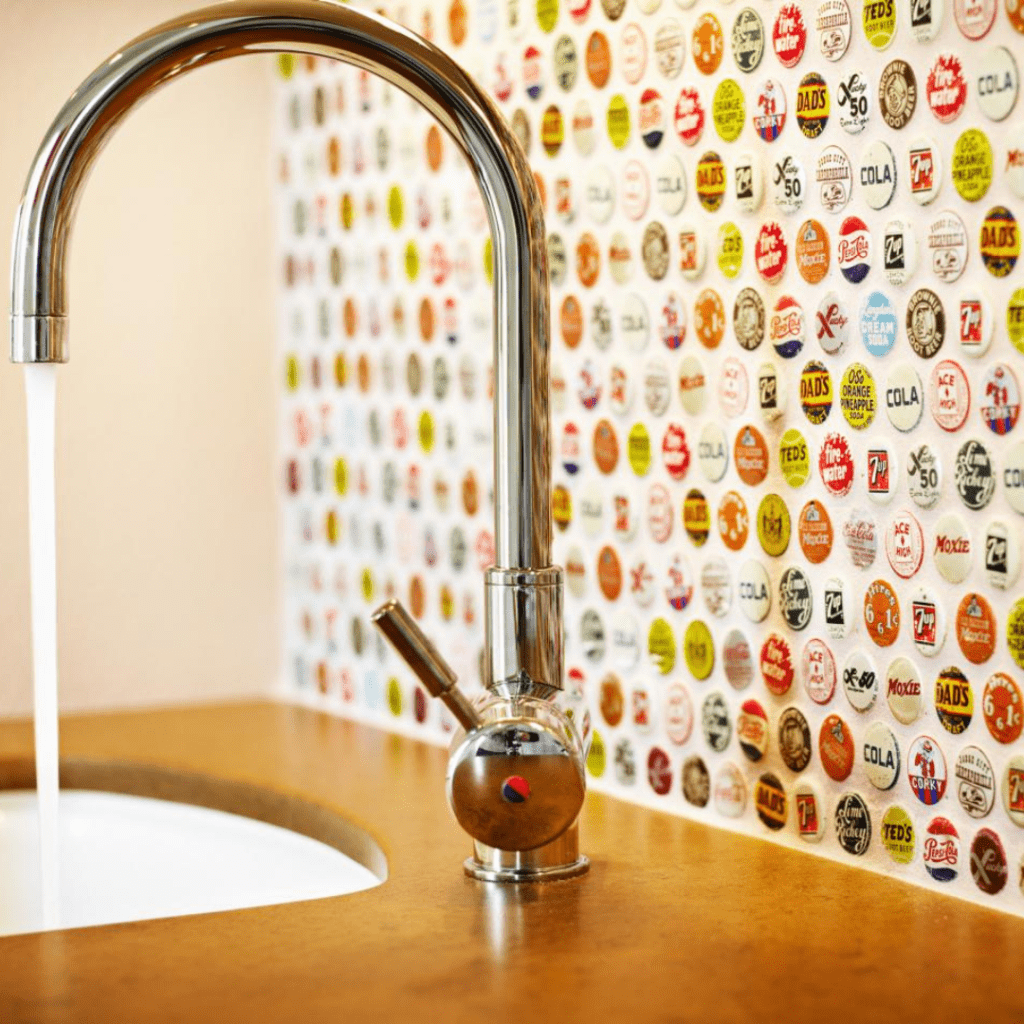
This will create a one-of-a-kind piece of art that is sure to be the envy of all who see it! It makes for an excellent and efficient form of protection from debris and liquids splashing onto the walls while also adding an interesting visual element. This makes it ideal for bathrooms too.
Vibrant serving platter
You can make an impressive serving mat out of old bottle caps! To begin, sort the bottle caps according to color or pattern. Then, lay it out on some wood or boring metal tray that’ll serve as your base. Once you have them arranged…
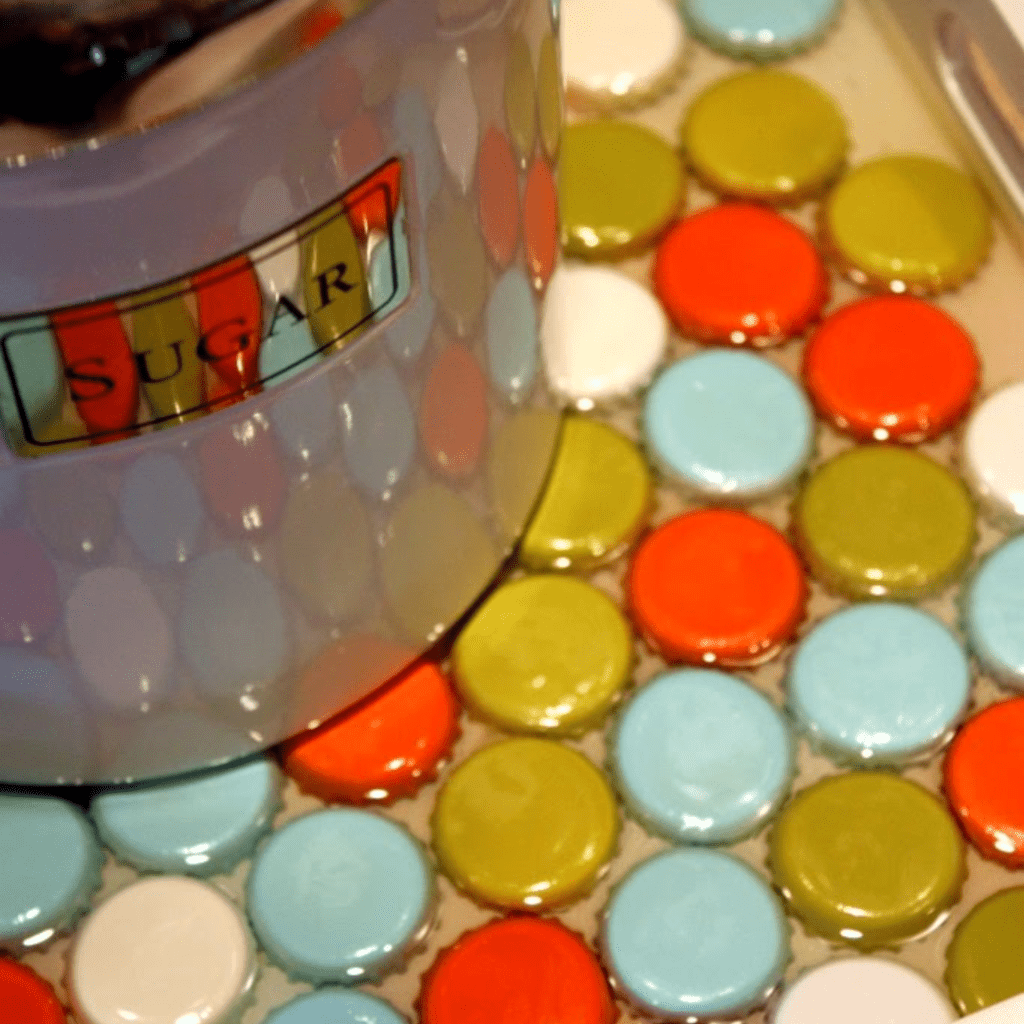
…use strong craft or super glue to attach the caps to the base. Then, once they’re on there, add an extra layer on top of the caps for an extra strong seal. You may want to fit the caps together like jigsaw pieces to minimize gaps between the caps.
Table decorations
Decorating with bottle caps is a great way to give new life to old items and make your home unique. You can create a table runner using strips of fabric and some bottle caps, creating a unique multicolored runner for the center of your table.
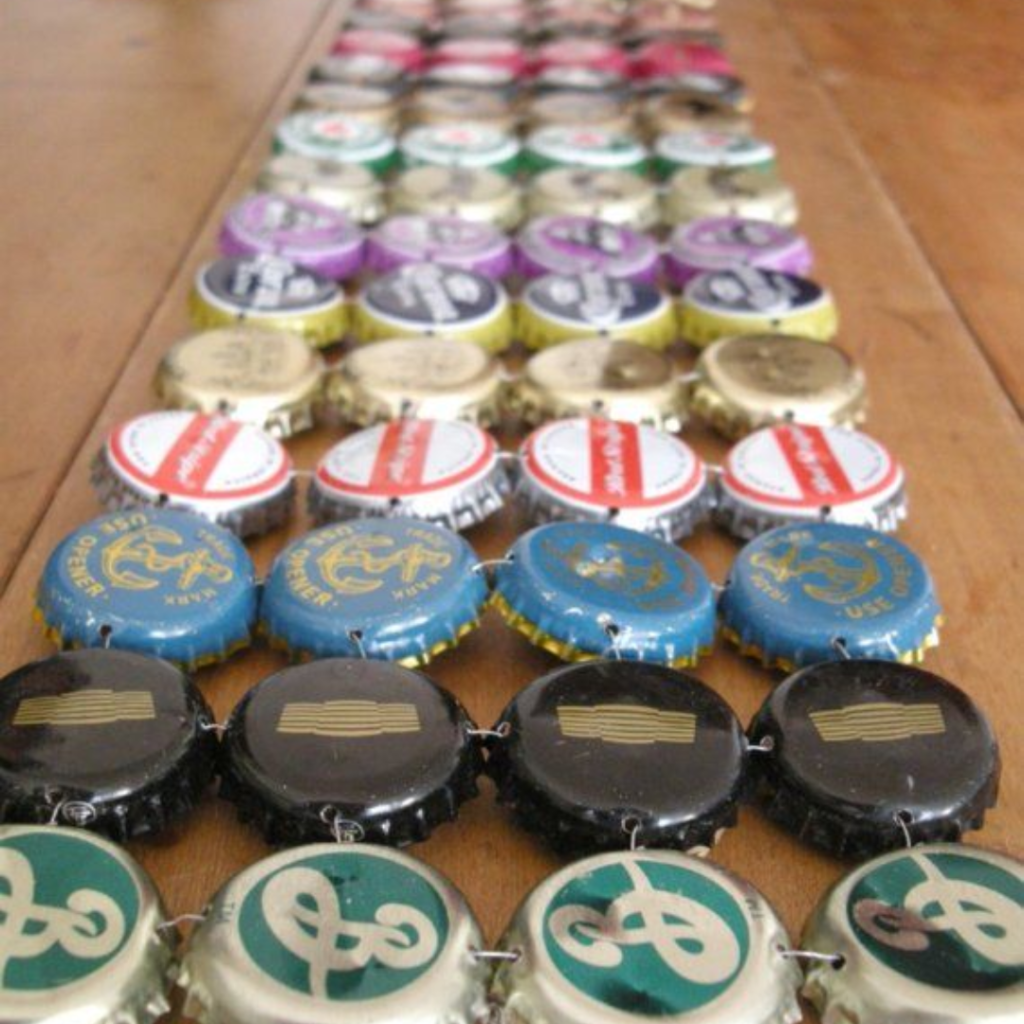
The best part is that you can customize the length and width according to your needs. You can use either plastic or metal caps. If you opt to use metal caps, we recommend attaching them to a fabric so the table runner doesn’t scratch your table.
Decorate kids’ room
Decorating a kid’s room with old bottle caps can be a fun and creative way to add interest and excitement to the space. Gather as many colors and shapes of caps as possible for more exciting designs. There are lots of different ways to turn them into decorations.
Create wall art by gluing them onto poster boards in abstract designs or pictures (e.g., flowers, trees, etc.), and mount them on the wall. Let your kids get in on the fun and have them choose the design and colors with you. It’ll make it feel more personal.
Fancy upcycled keychain
Everyone needs a keychain. Whether you just have a house key, or a whole ring with keys for work, home, and your car, a keychain is a simple way to keep everything together. Why not make your own using upcycled bottle caps?
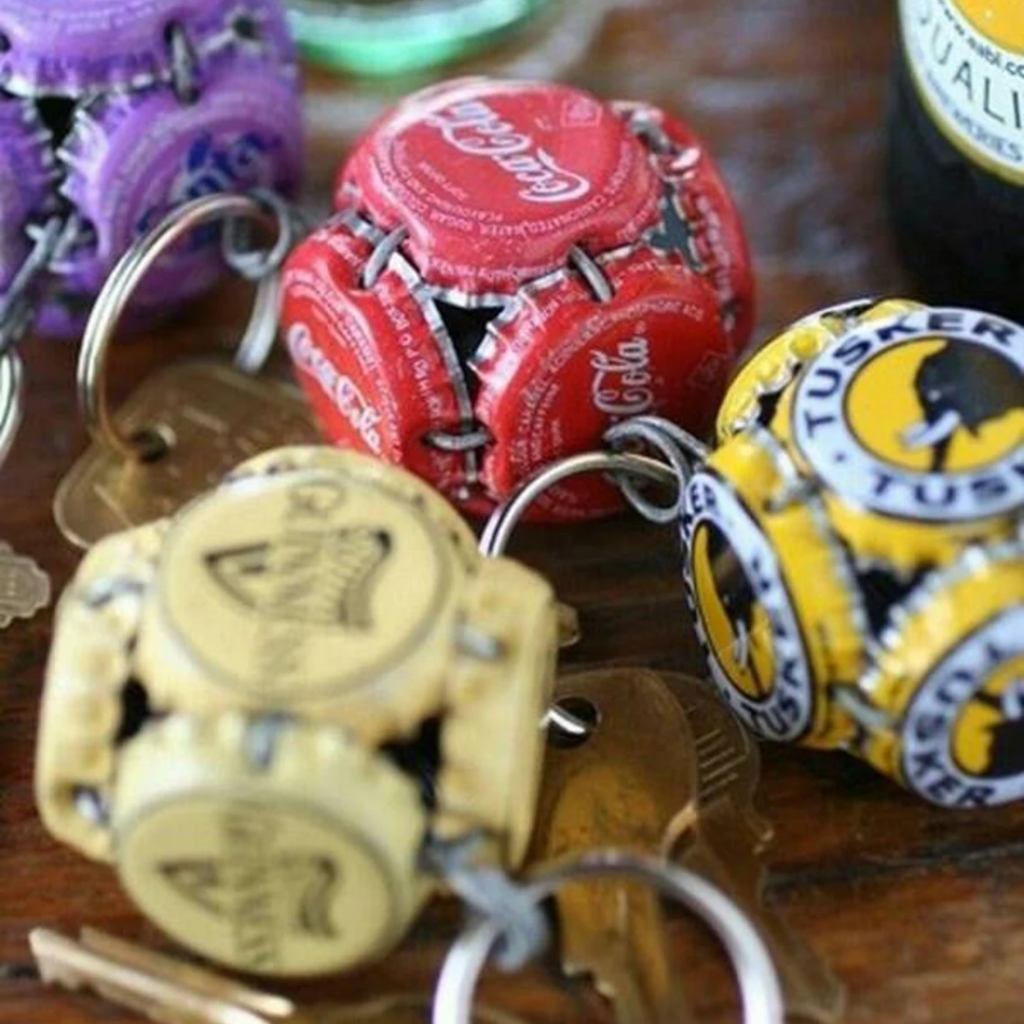
You can make it as simple or abstract as you want. 3D designs will take some practice, but the results will be worth it. You’ll have a unique keychain… and no one will ever accidentally grab your keyring again. It’s one-of-a-kind!
Adorable pincushion ring
Making a pincushion ring out of old bottle caps is an innovative and unique way to reuse something that would otherwise be thrown away. For this project, you will need some glue, pins, scissors, and fabric in any color you choose.
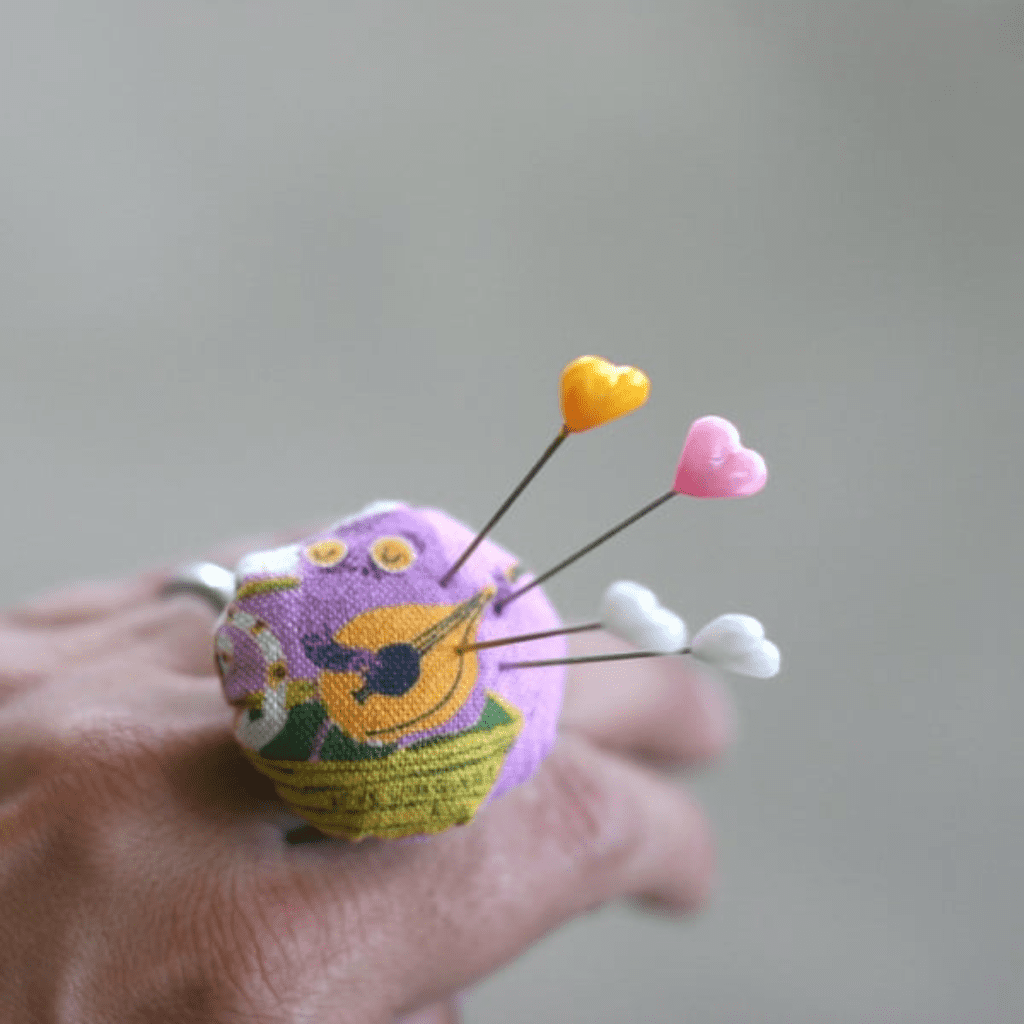
Cut a circular piece of fabric roughly 1 inch longer than the bottle cap. Start by gluing the edge fabric to the cap, stopping when you’re 3/4 done. Then, stuff the pocket with some cotton or scrap fabric. To complete your project, simply glue the remaining fabric.
Bottle caps shadowbox
Making a bottle cap shadow box using old bottle caps is a fun way to create something unique with items you have around your home. It’s also surprisingly easy, and the results can be truly stunning. Begin by setting up a box with an opening at the top and one plastic or glass wall.

Add some text or patterns if you want. Now all that’s left to do is set it up by your drinks cabinet or coffee table and toss in the used caps every time you have friends over for game or movie night.
Picture pendants
If you liked the ornament hack bottle caps but want to utilize that style year-round, this project might be what you’re looking for. Instead of old-fashioned lockets, why not keep a picture of your loved one close on a pendant you made yourself?
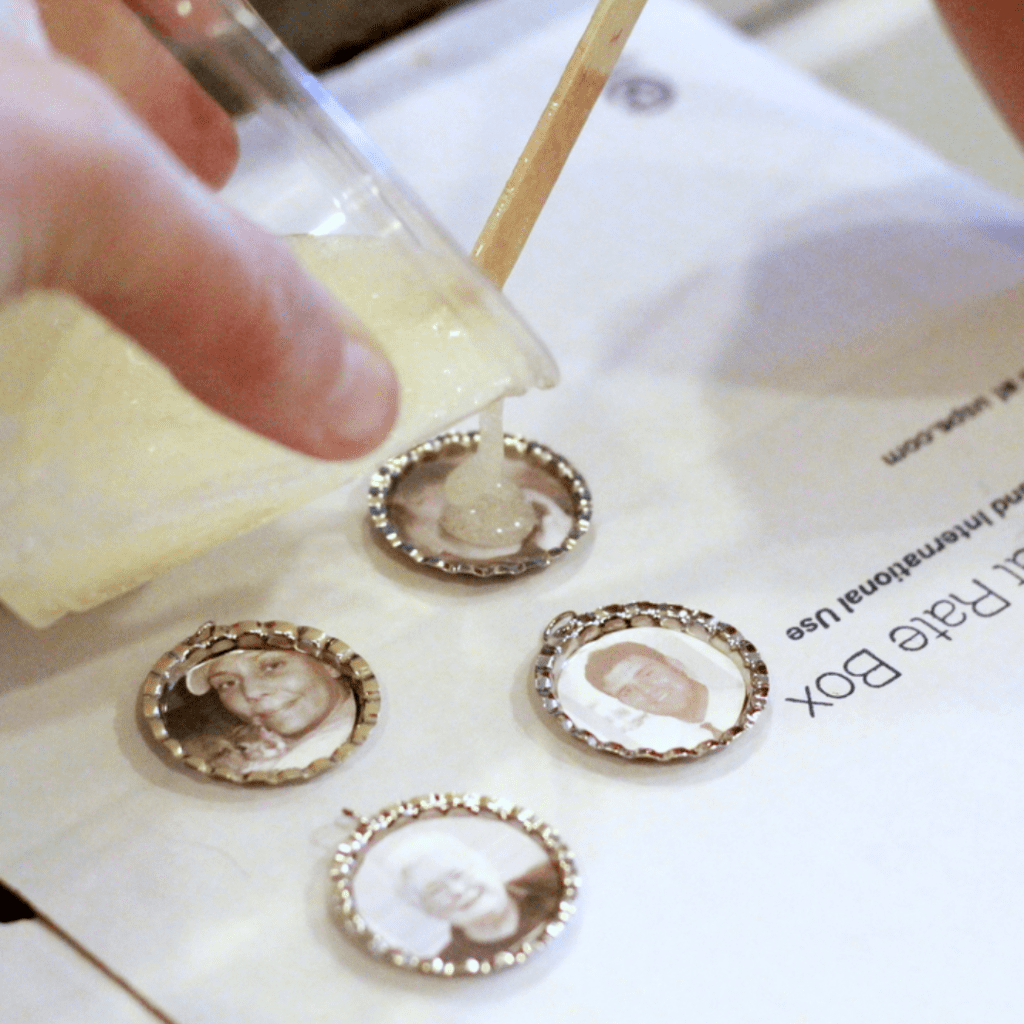
You can use any type of cap, but this will look best with metal ones. Start by hammering the bottle caps flat. Then, punch a hole for the jump ring to go in. Only glue in the picture once the cap is a pendant.
Cap magnets
Crafting magnets from old bottle caps may seem like a difficult task, but it’s surprisingly easy and fun to do! All you’ll need are some bottle caps, small magnets, and possibly some glue (if the magnets don’t have an adhesive on them).
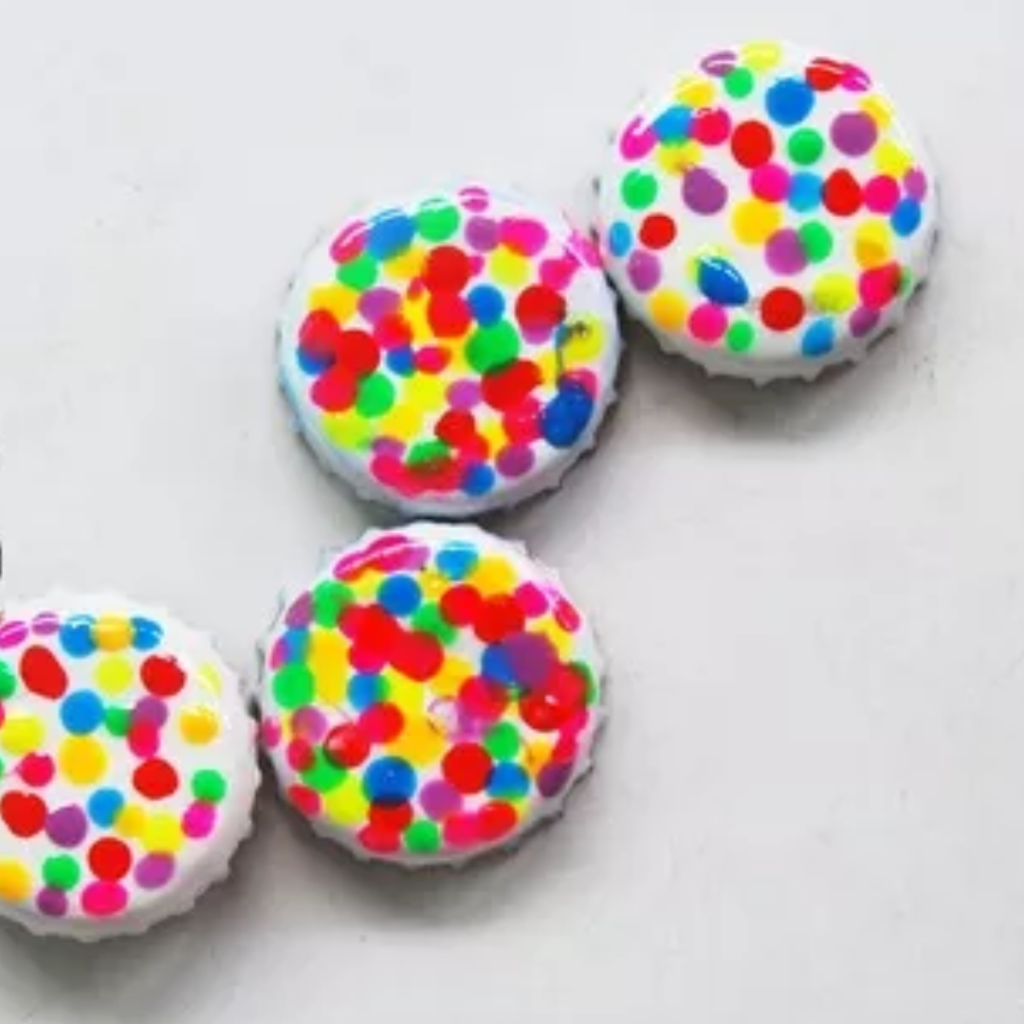
Make sure to thoroughly clean the caps. If they’re metal caps, ensure that they’re dry, too. You don’t want any rust buildup. To make this, simply glue the magnet to the back of the caps, ensuring that the magnets are thick enough so that the bottle cap isn’t flush with the fridge.
Recycled garden decor
Creating garden decorations from old bottle caps is a creative way to recycle materials and add some personality to your outdoor space. You can use just bottle caps, or mix it up with other upcycled materials. The possibilities are endless!
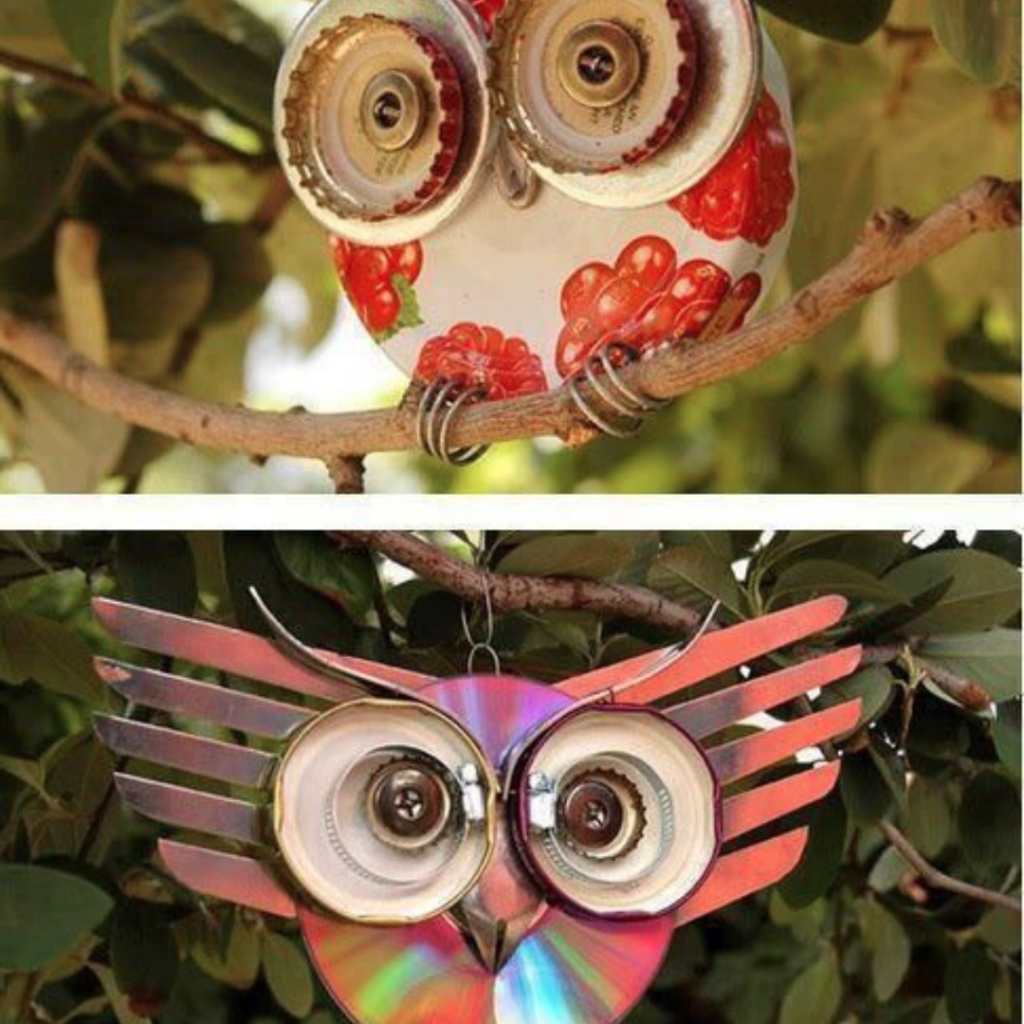
Use wire and screws to make a small owl decoration, or go big with a CD. You can even make multiple pieces for a whole flock of owls. Whatever design or materials you choose, it’s guaranteed to be a one-of-a-kind piece your friends are sure to love.
Multicolor necklace
Creating a multicolor necklace using old bottle caps is an easy, creative, and budget-friendly way to give your wardrobe a fun new twist. All you need are some empty bottle caps, jump rings, and a jewelry chain. Start by cleaning the bottle caps with soap and water.
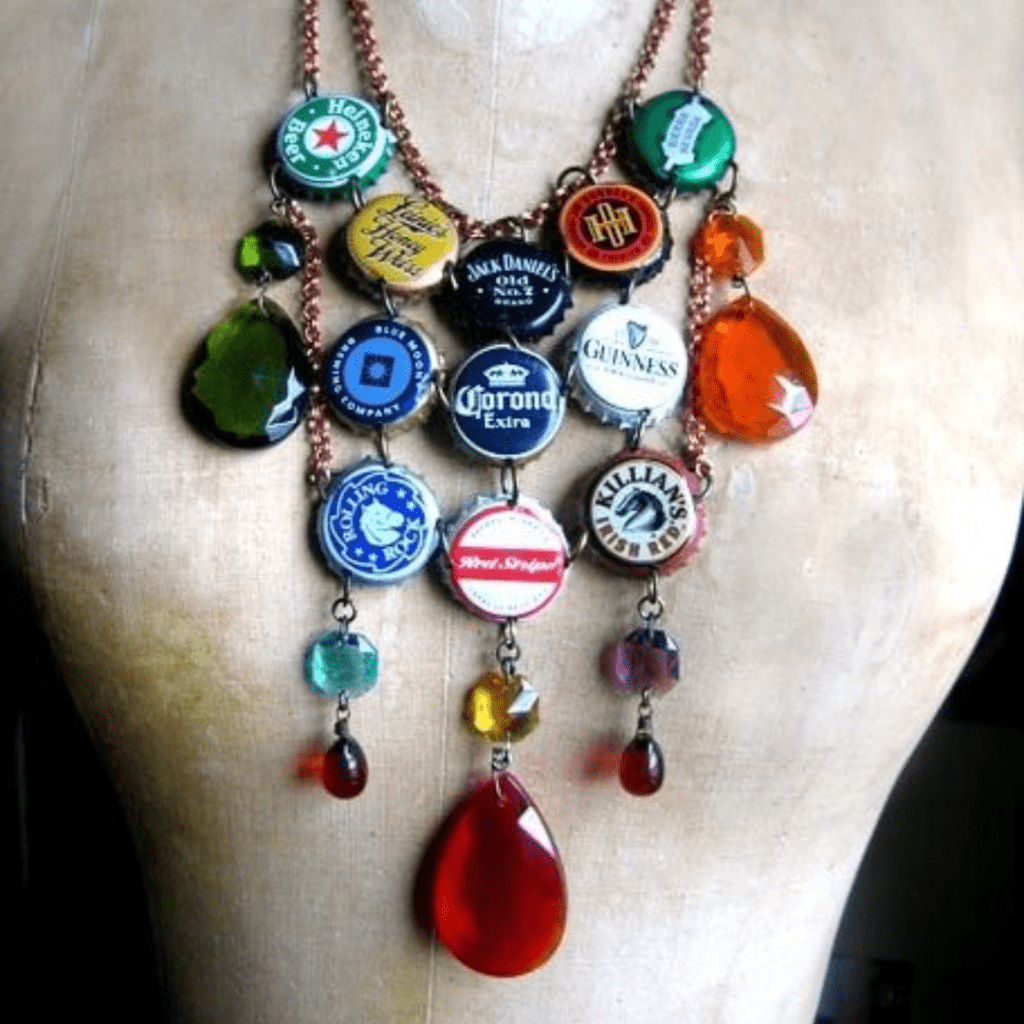
Once they’re dry, create a fun pattern using bottle caps and charms. You can make it big or small; whatever suits your style. If you’re feeling particularly crafty, why not paint some designs on the bottle caps? This’ll add some flair if you only have plain caps.
Colorful heart design
If you want to create an upcycled piece of art to give to your significant other, you can try making a heart using bottle caps. Start by gathering as many red and white caps as you can find. If you find pink caps, save those, too.
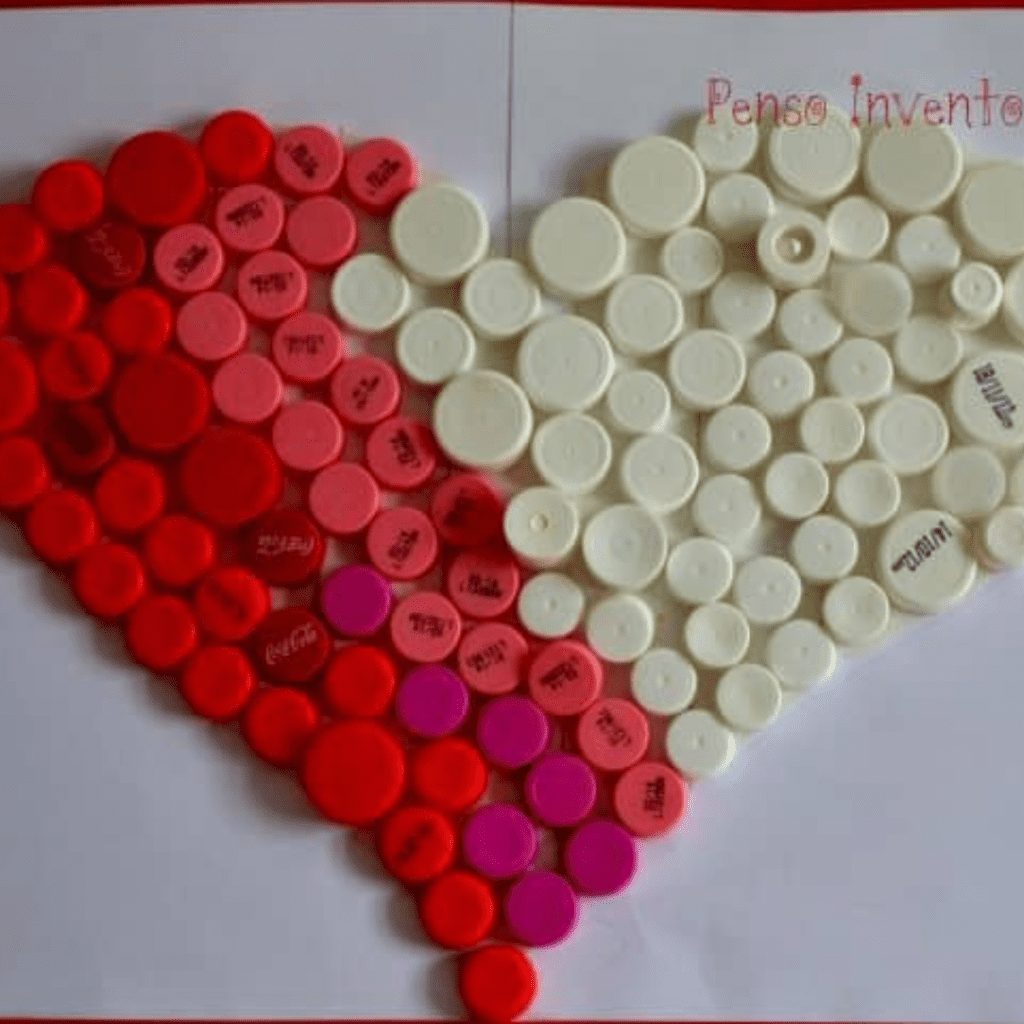
Lay out the caps you’ve collected and make a heart shape. You can do half-red and half-white, as shown above, or you can scatter the two colors. If you manage to collect caps that are all the same depth, you can glue directly between the rim of each cap for a solid piece of art.
Cute hair clips
Turning your old, boring hairclips into something trendy and fashionable can be a lot of fun! Since bottle caps are easy to come by, you can make multiple clips, each designed for a different outfit style or even different holidays.
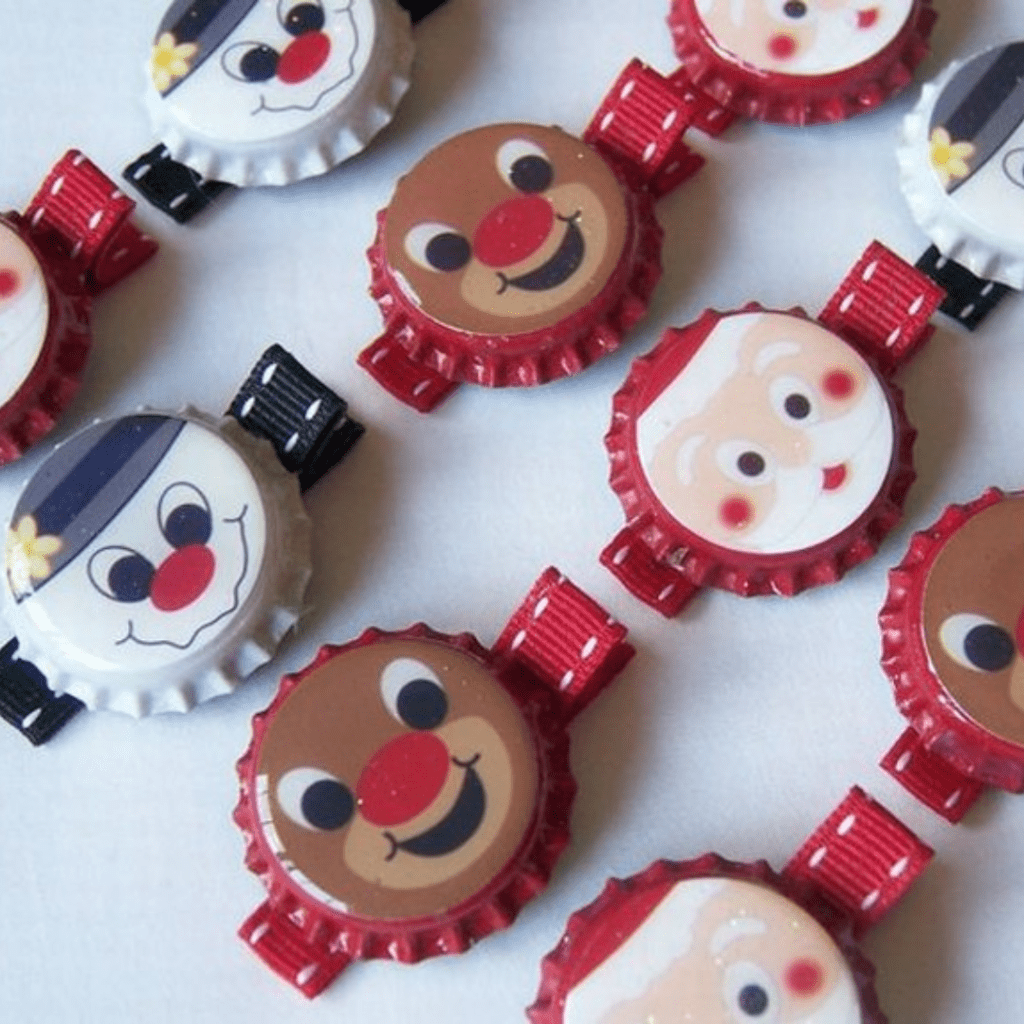
You can print out designs to attach to the outside of the cap or paint on it with your own funky design. Then all that’s left to do is glue it to the clip. You can also try this with hair ties if that’s more your style.
Fancy door curtain
We’re back with another curtain design. We couldn’t help ourselves; it’s too unique to ignore. Instead of randomly stringing together those bottle caps, take the time to lay out a pattern. But be warned; this one requires a lot of time and patience.
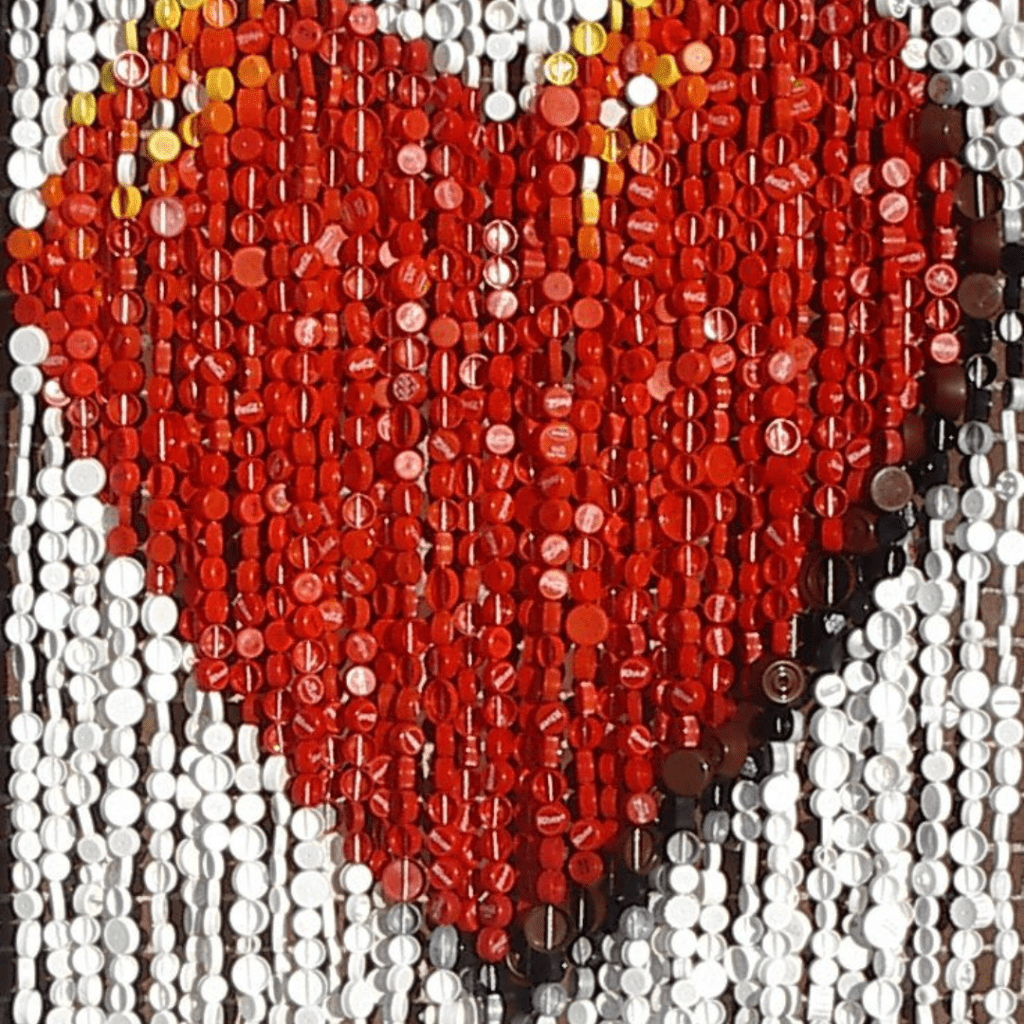
Make sure the caps are washed and dry before getting started. We recommend laying out your design on the floor and threading through each strand separately. Don’t just eyeball it, or you might have to undo a few strands along the way.
Wall owl from caps
It seems that people love bottle cap owl designs, and we’re here for it! To start, cut out a piece of wood into the shape of an owl—or whatever animal design you want to make. Sand the edges and add a hook before getting started.
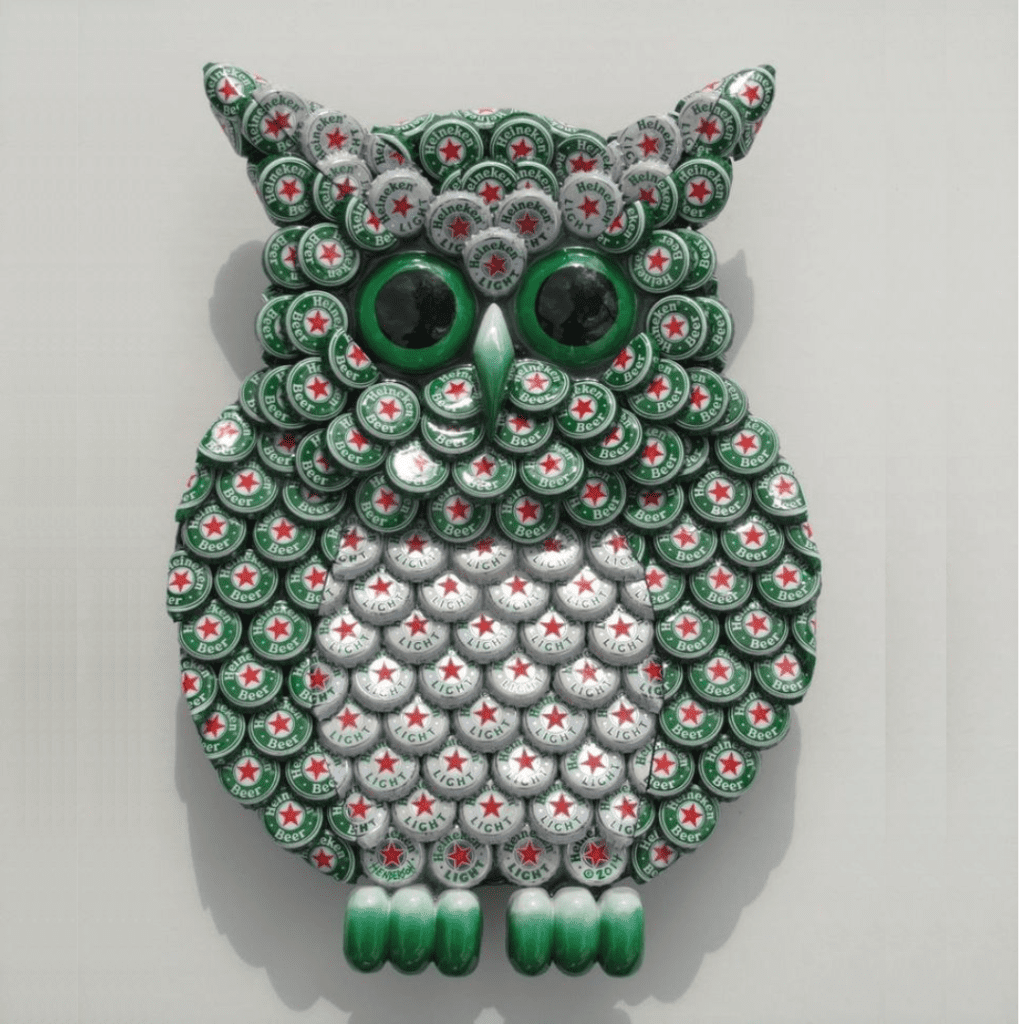
Nail bottle caps, starting from the top so it’ll create a cascading pattern that mimics feathers. For the edges, use some pliers to wrap the caps around to create a finished look that is sure to stun everyone that comes into your home.
Small candles
Trends come and go, but tea lights will always be a popular accent to any home. To give them a fun vibe, use bottle caps to make those cute tea lights. For this, you’ll want to use metal caps since plastic ones could melt if the wick burns too low.
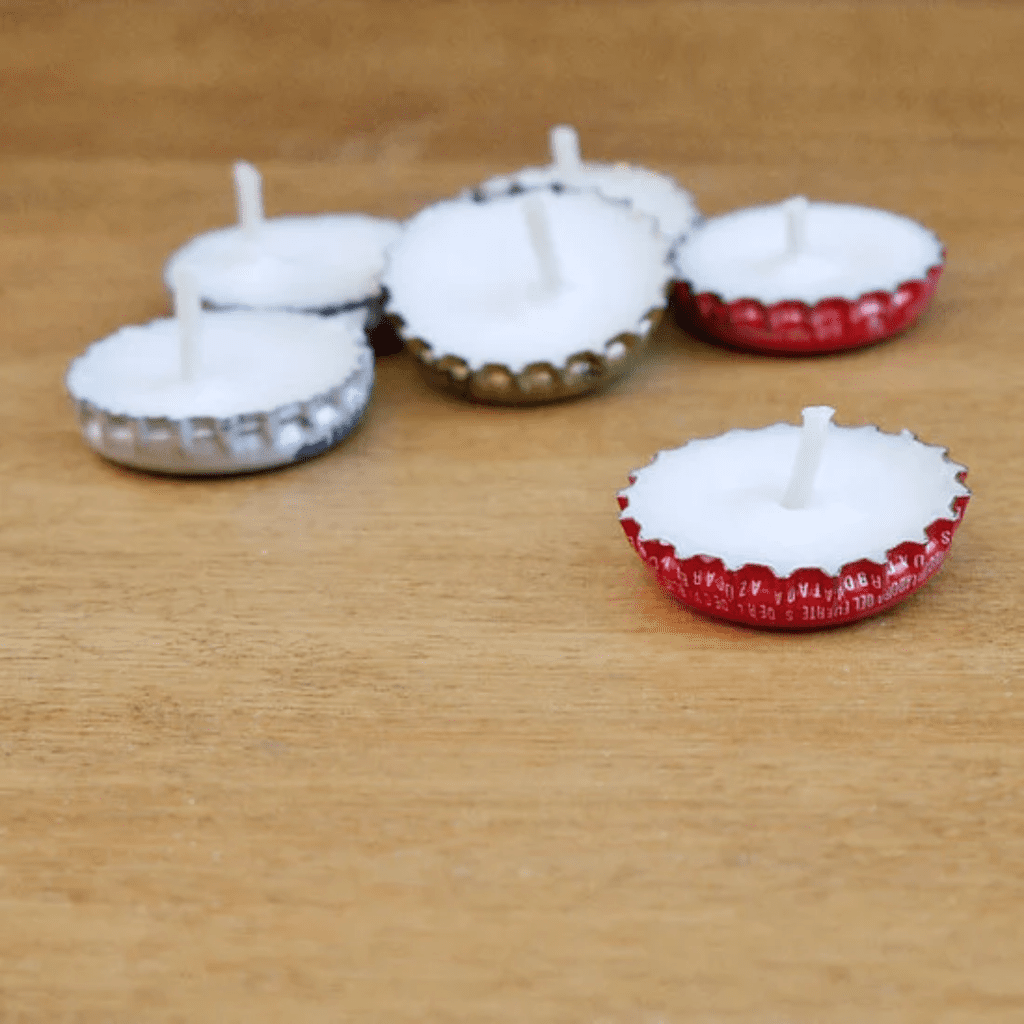
Use some glue to attach the wick to the base of the cap. That way it’ll stay in place when you add in the wax. Speaking of, the next step is to pour in hot wax. Be careful when do you; you won’t want to spend hours cleaning wax off your counter.
Glittery stars
Turn metallic bottle caps into glittery stars with an assortment of metallic bottle caps, pliers, beads, glue, and glitter. Start by bending the caps into shape. Get them as curled up as possible. Then. circle them all around a bead and glue them in place.
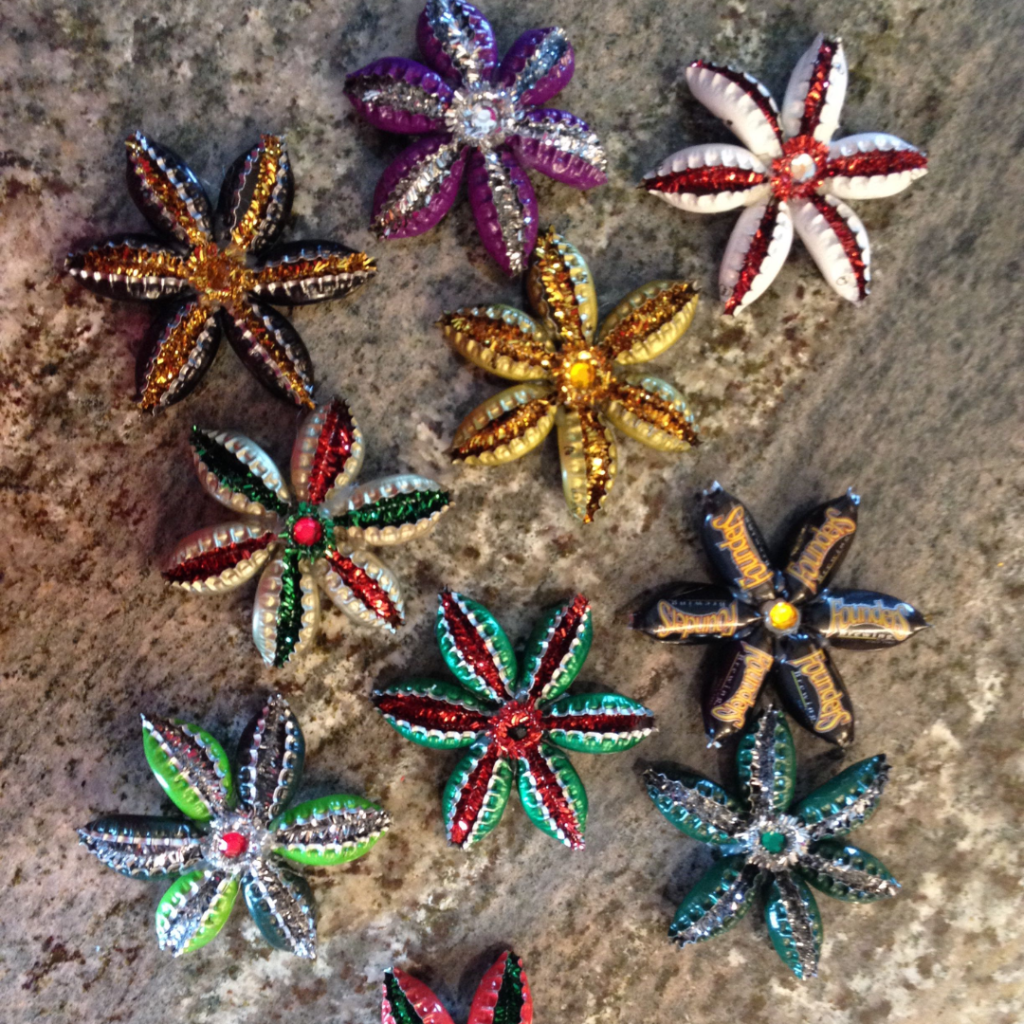
Once the glue is set, fill the empty pockets of the caps with glue and pour in the glitter. You can leave them as is and keep them on your shelf for decoration, or you can glue a magnet to the back and put them on your fridge.
Bathroom floor upgrade
It may sound like an unlikely solution, but using bottle caps as flooring for your bathroom can be surprisingly stylish. This DIY is for anyone looking for a unique way to style their bathroom. You’ll need a bit of professional help for this one, though.
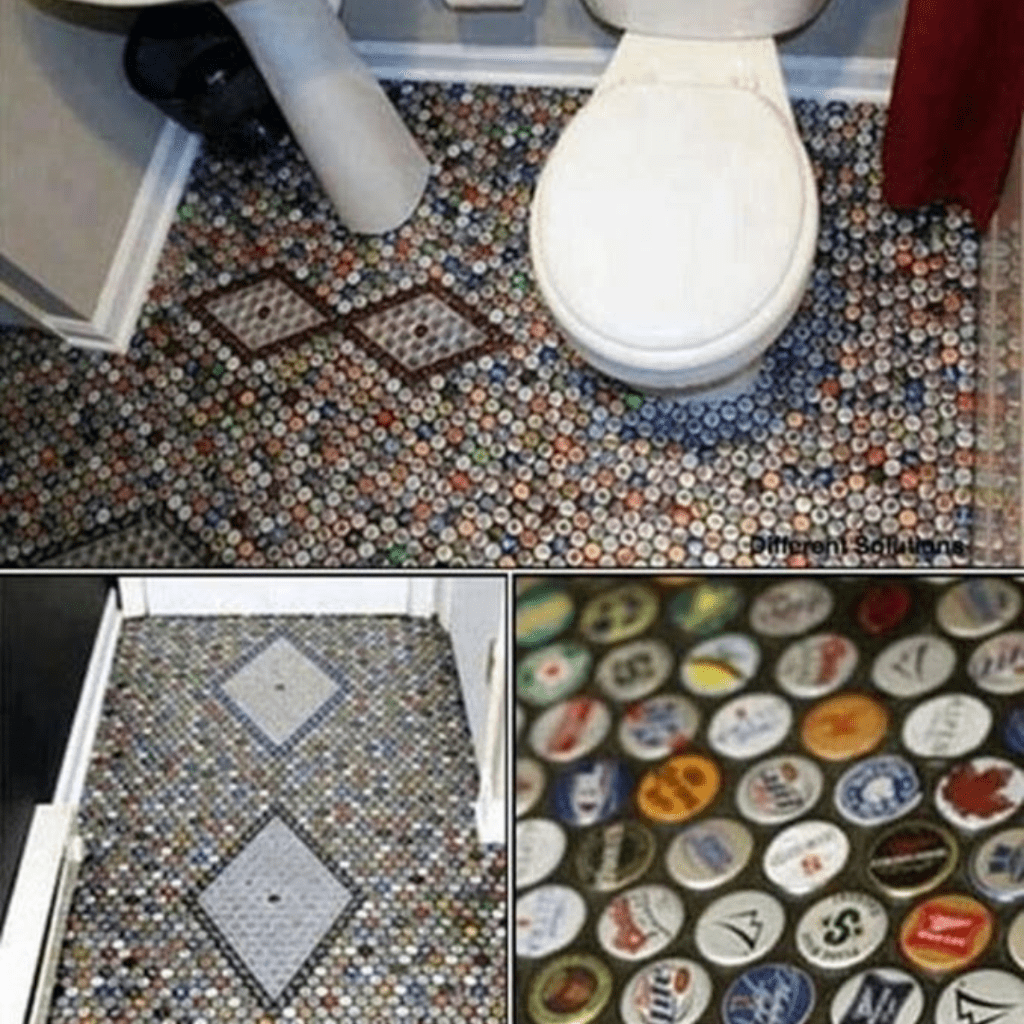
Do this in sections, as undoing your handiwork can take up a lot of time. And, before you start, make sure you have enough caps. Otherwise, you’ll have a half-finished project. Use plaster or quick-dry cement to hold the caps in place. Make sure they’re flush with each other for a smooth finish.
Artistic human eye
Making artwork out of bottle caps is easier than you may think! To create a human eye, you’ll need to break down the different elements of the eye and figure out how to replicate them with materials found in bottle caps. For starters, use black bottle caps to make the pupil.
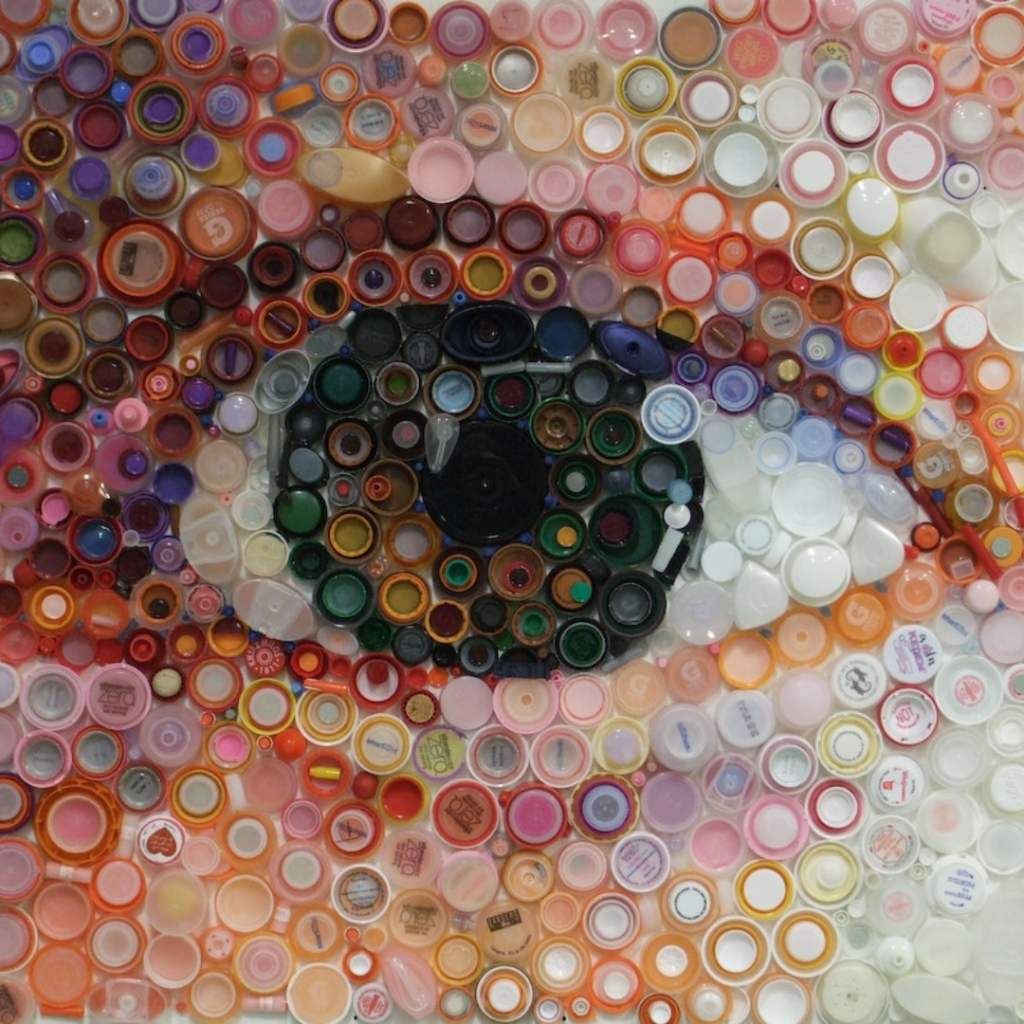
This will be the core focus of your art piece, so it’s crucial that its shape and size look realistic. You can lay multiple pieces side by side or stack them on top of each other for a more dimensional effect. To give your pupil some shine, add metallic silver or gold caps.
Hanging decoration
If you’re a fan of the metal bottle caps, you can still make a beaded curtain, but it’ll take some elbow grease to make it happen. Just like the plastic curtains, make sure you set out all the caps you need beforehand.
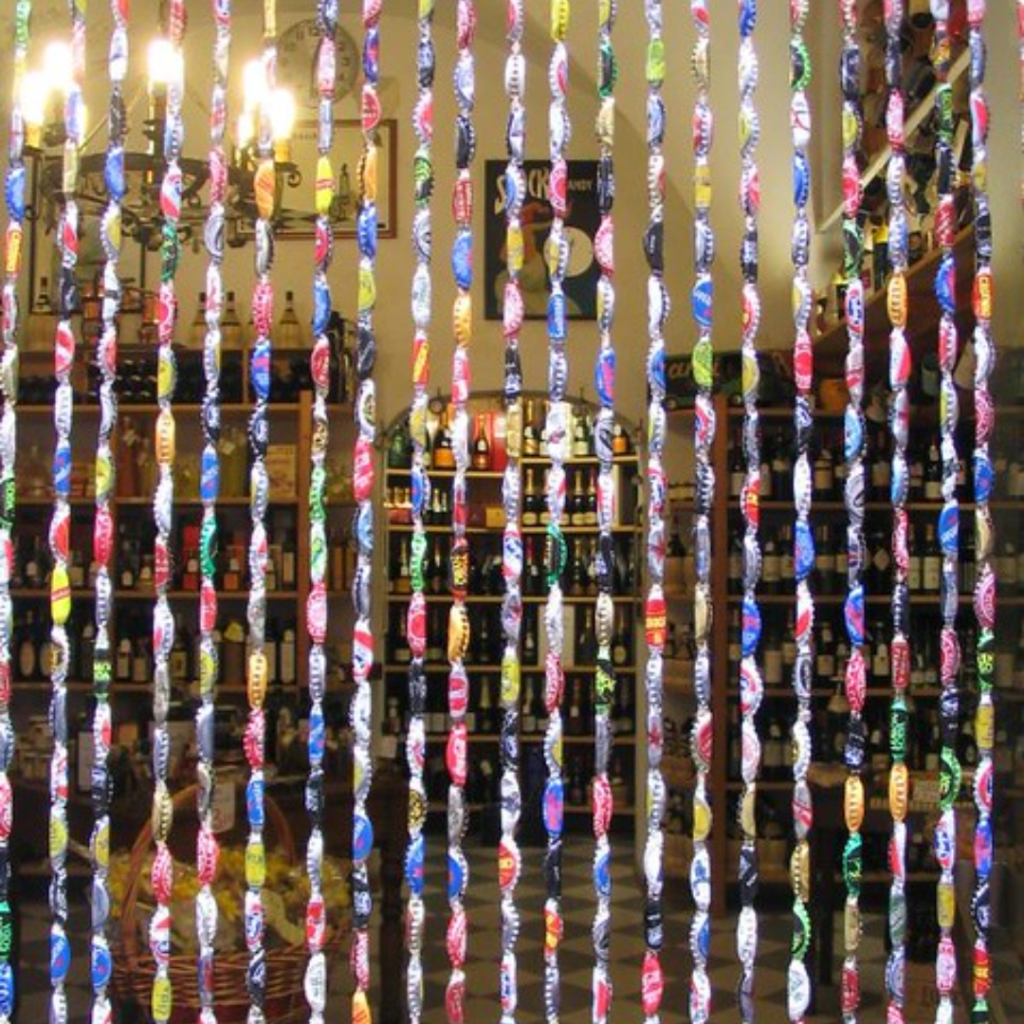
Instead of poking a hole in each cap, use pliers to wrap the caps around the twine. We suggest using a bead that the bottom to act as an end cap. Make sure to sand the edges so you don’t scratch yourself as you walk through your masterpiece.
Wind chimes for garden
Bottle caps aren’t just good for eye-catching garden decorations. You can turn those metal caps into a delightful windchime. Best of all, this can be a 100% upcycled project! For example, an old kitchen strainer makes for the perfect top of a wind chime.
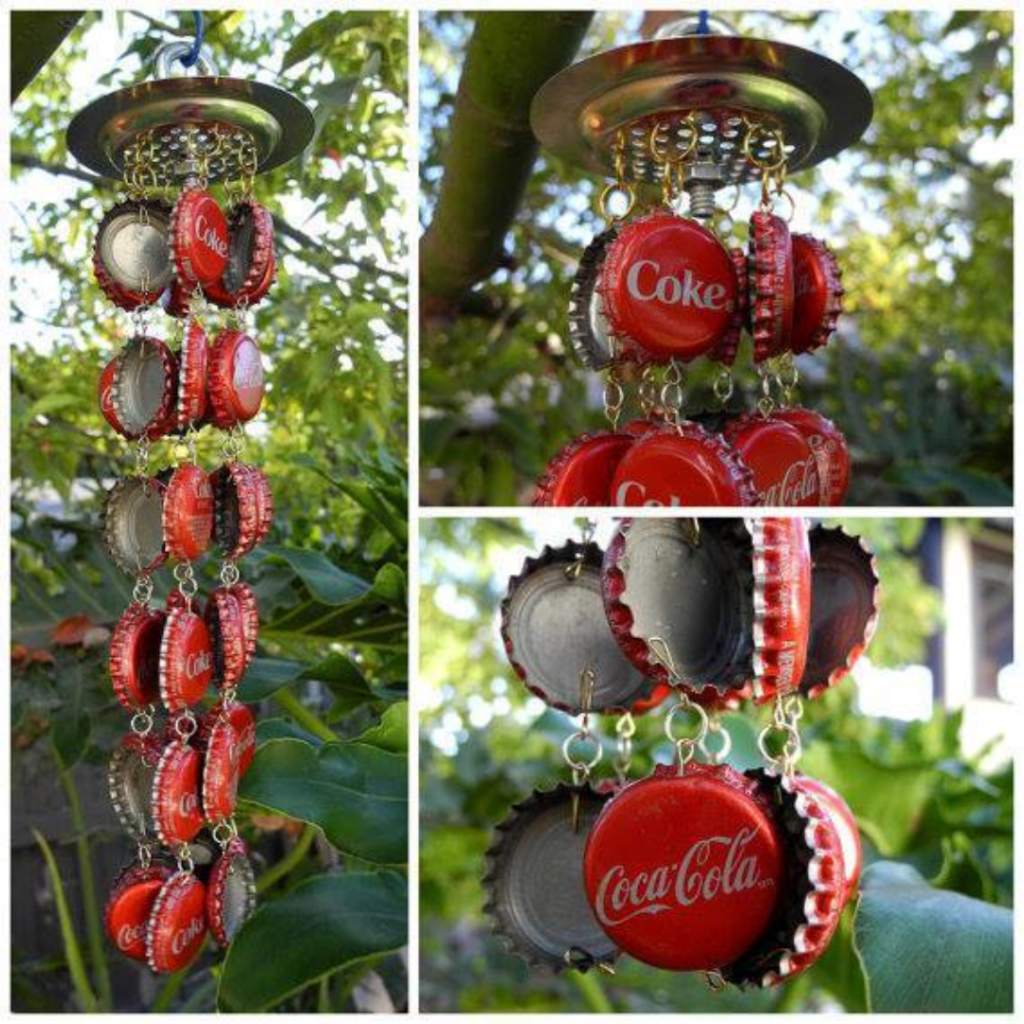
Loop all the caps together using jump rings, creating several strands of bottle caps. Then, attach those strands to the strainer and listen as the breeze passes through. You can use the same type of cap for a more aesthetically-pleasing design.
Bottle cap wall
Why settle for plain, boring walls when you can transform them into vibrant works of art with the help of old caps? Painting old caps and sticking them to the wall is a fun and creative way to bring some life into your home. Plus, it’s an inexpensive project.
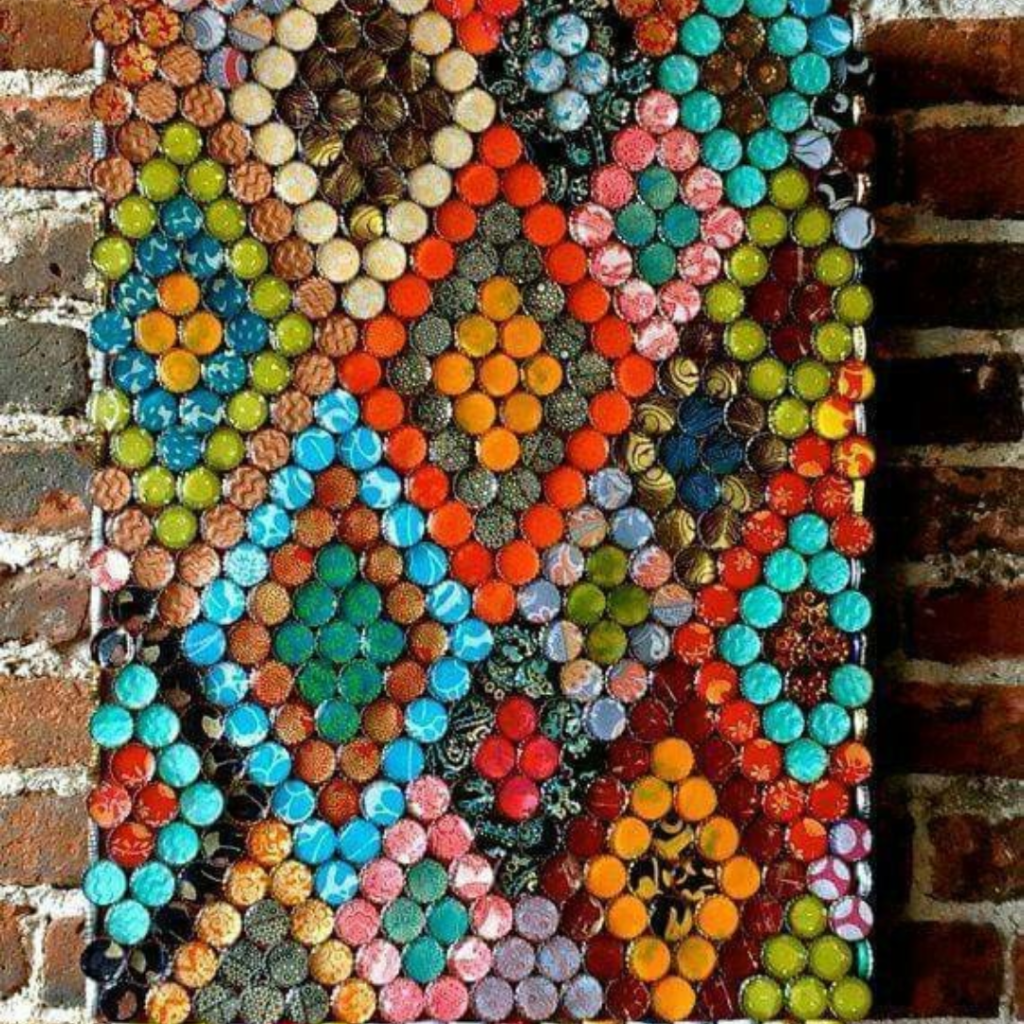
Once you have enough caps for your desired wall pattern, start painting them. Use acrylics to add some detail to the caps. Allow sufficient drying time before beginning work on your masterpiece. Glue them onto cardboard and hang up your masterpiece.
Unique lighting fixtures
You don’t need to go out and buy expensive lighting fixtures for your home when you can create your unique pieces for a fraction of the cost! Making lighting fixtures from old bottle caps is one of the most creative DIY ideas out there, and it’s surprisingly easy to do.
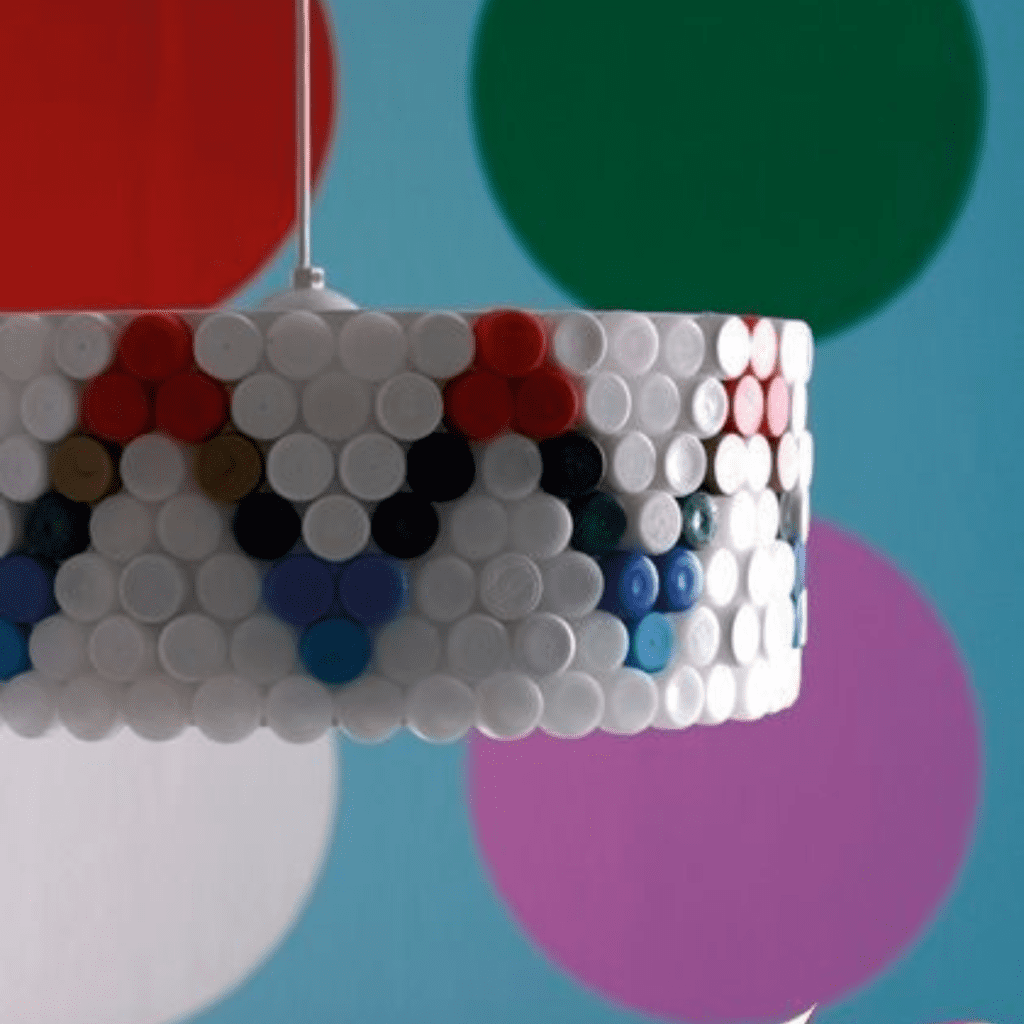
Start by arranging your bottle caps into whatever design you have in mind. Then use hot glue or solder to connect each cap together until you’ve created the fixture’s base shape. Next, add any decorative elements. Don’t use this lampshade with any bulb that heats up too much.
Thumbtacks
If you have a corkboard, you know how fun it is to have different styles of pushpins. Why not make your own, personalized ones? Just get some flat-headed pushpins, glue, paint or pictures, and bottle caps to make it happen!
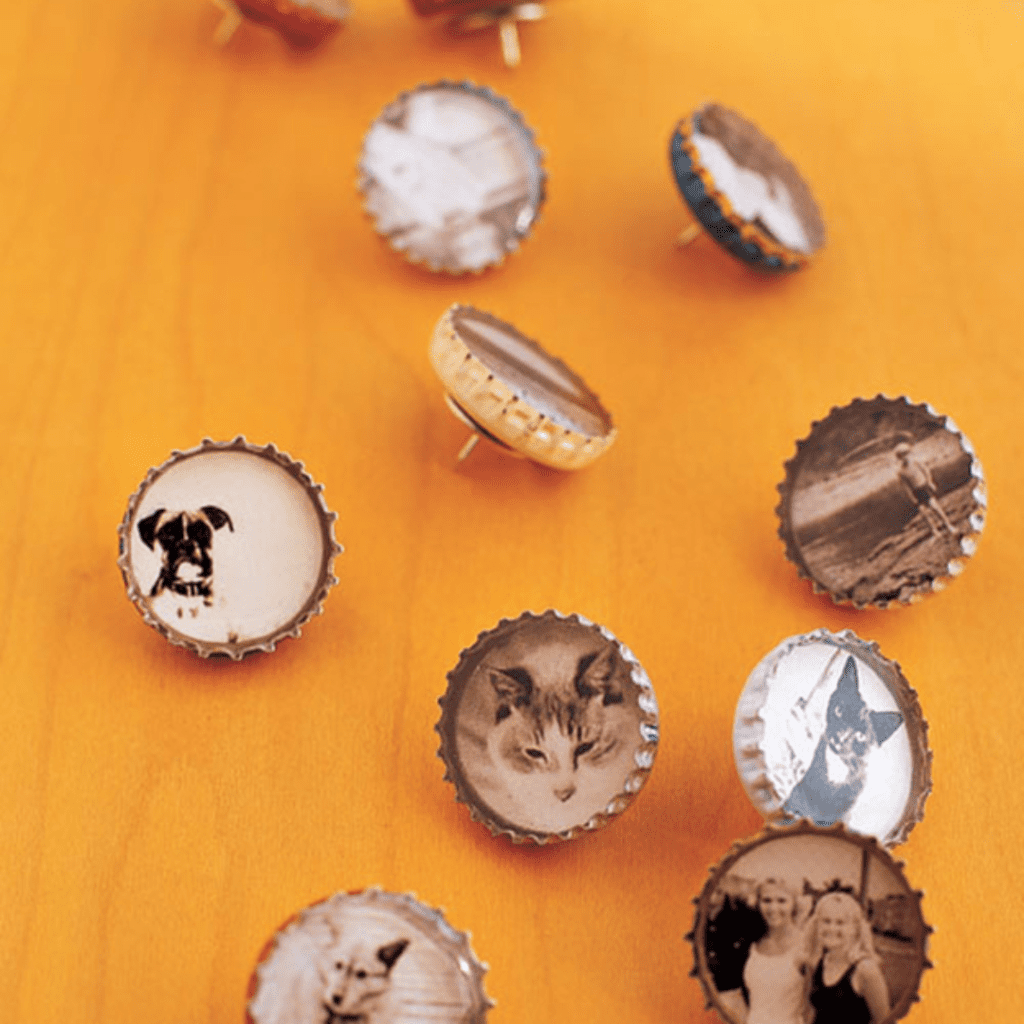
Making this project is similar to the magnets, except this time, you’re using pushpins. It’s pretty simple, but you should be careful when piecing everything together. You can use paint, photos, or even cute clippings from magazines for the decoration.
Christmas tree ornaments
If you want a bottle cap Christmas ornament but don’t like the flat ones we showed you earlier, this bauble might suit your style. DIY ornaments are easy to find around Christmas, so get a few of those to act your base.
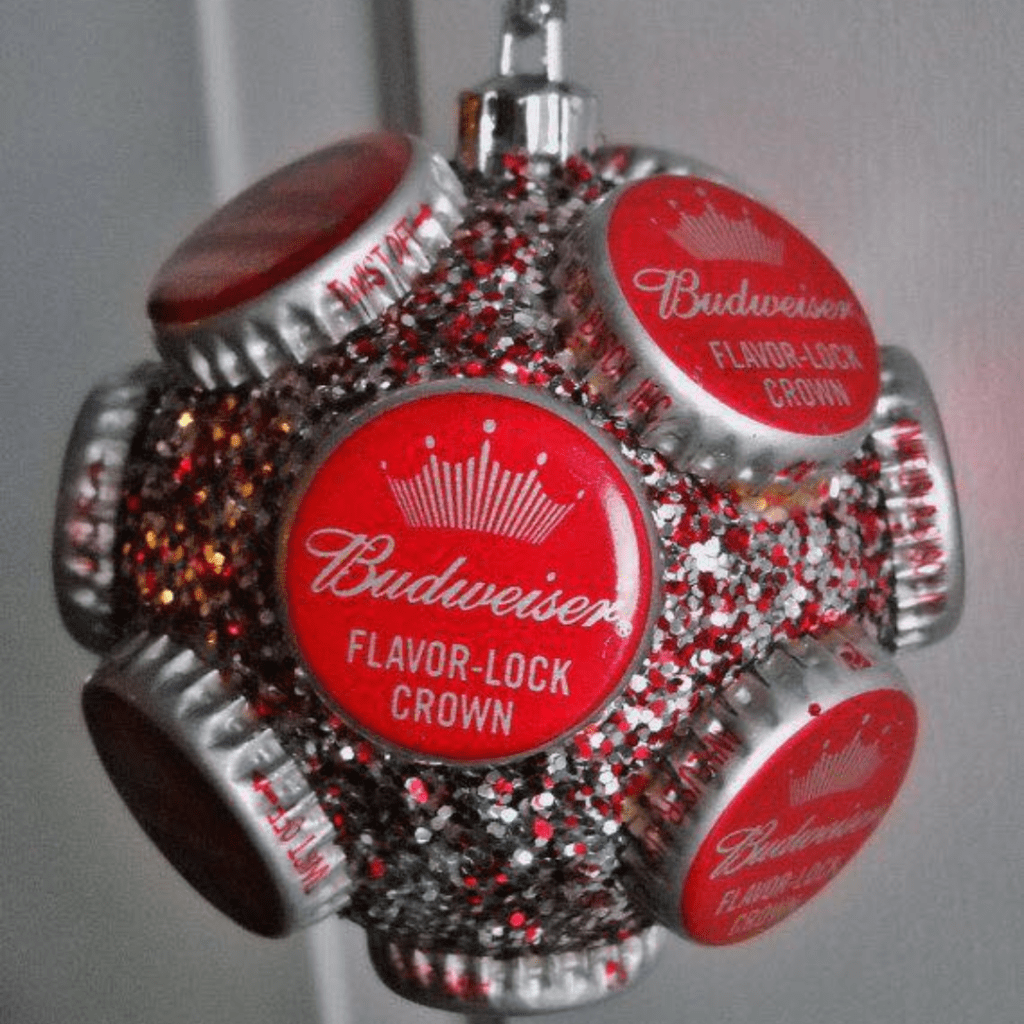
Just glue on the bottle caps. You can cover the bauble entirely with caps, or make it sparse and fill in the gaps with glitter and sequins. Glitter will give it that extra sparkle to make your new ornament shine.
Snowfall installation
If you’re looking to make a winter wonderland at home—either for the holiday season or in the summer if you miss the cold so dearly—white bottle caps and fishing line or thin rope will help you out. Create a unique snowflake installation using just those few materials.
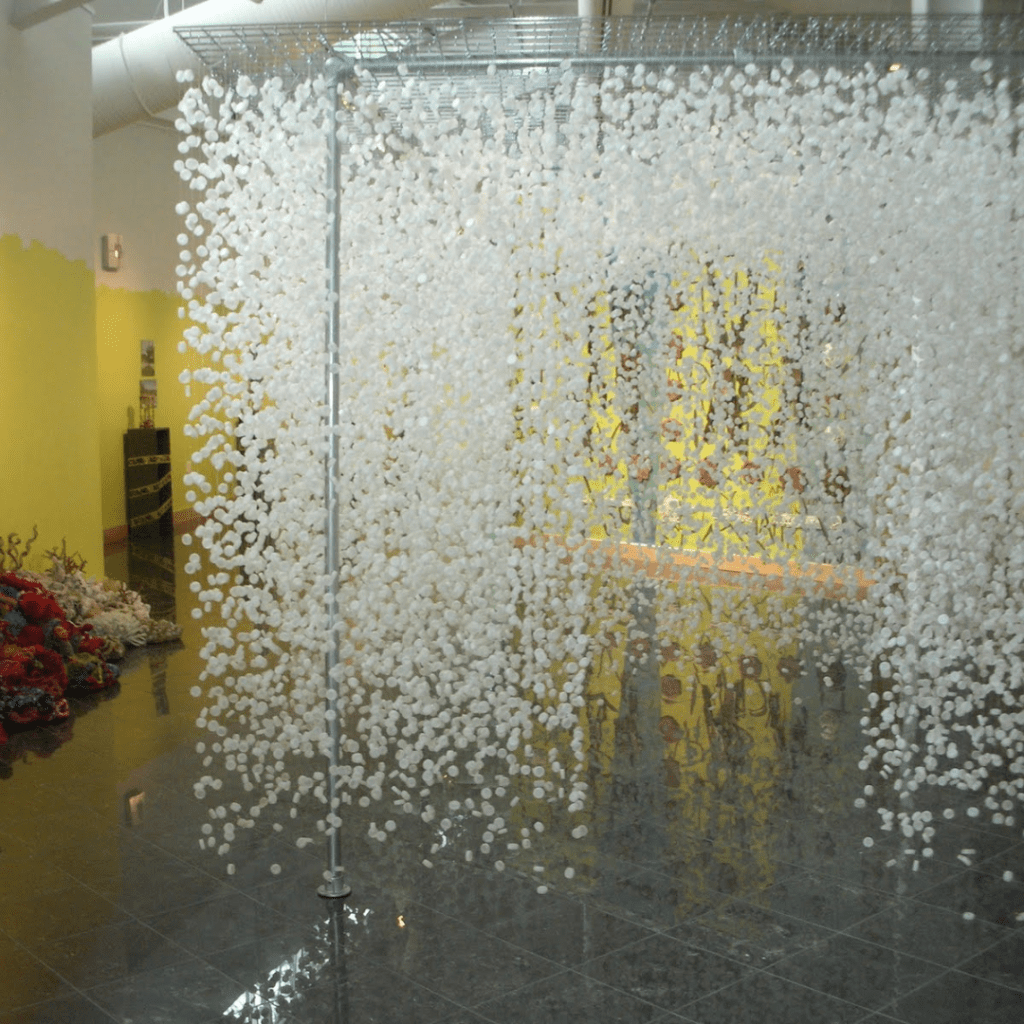
Create “snowflakes” by stringing together white bottle caps. Tie a knot and add a stopper bead after each cap in order to space them out. Otherwise, you’ll end up with a white curtain, just like the project we saw earlier. It’s cool, but it doesn’t feel like snow, does it?
Christmas tree
What can we say? It seems like bottle caps and Christmas are a match made in DIY heaven! Add a unique holiday flair to your home this season by patining old bottle caps green and arranging them in the shape of a Christmas tree.
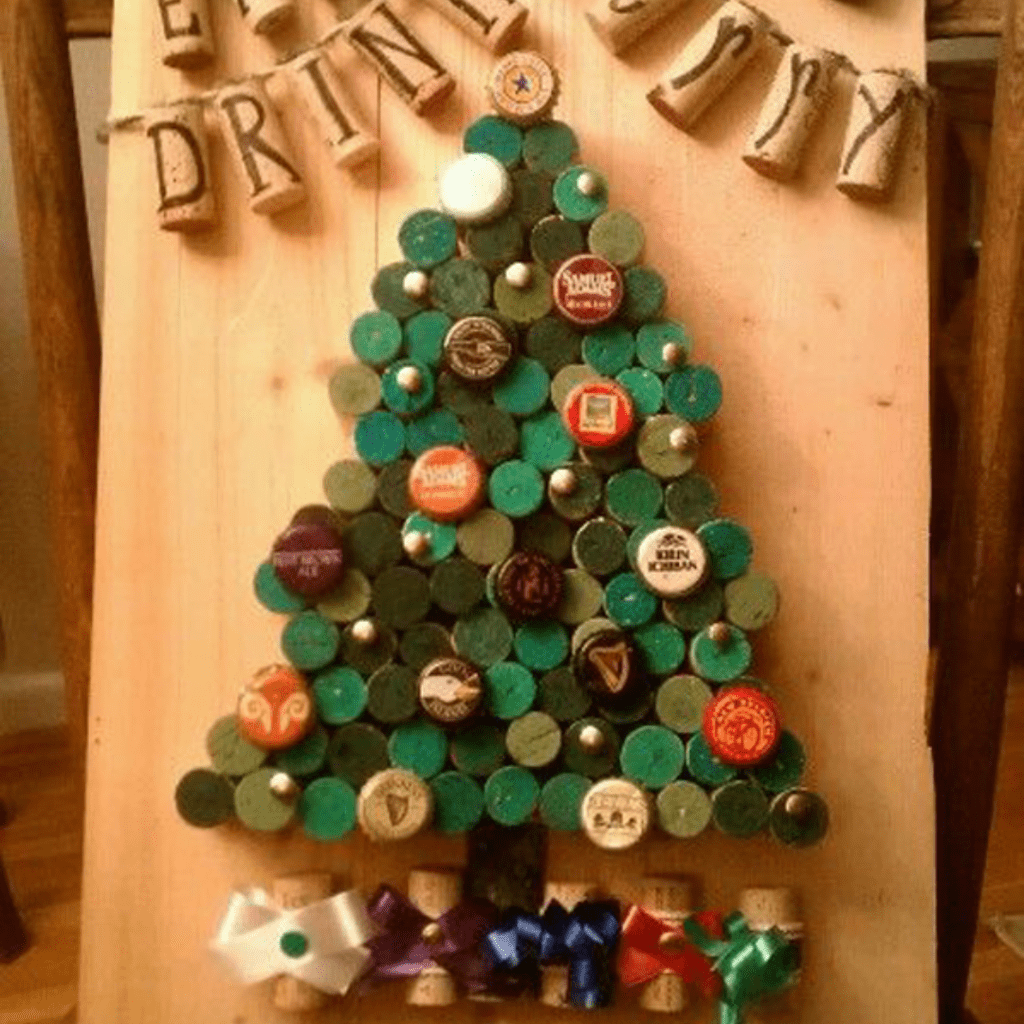
Use smaller brushes and thin layers of green paint for an even finish on each cap. Once all your caps have been painted in your desired color. Start with one at the bottom—using hot glue to attach it onto another cap at a slightly different angle until you’ve achieved a cone-like shape.
Fridge magnets
Making fridge magnets out of old bottle caps is a fun and creative DIY project that will make your refrigerator look unique! It’s also an easy way to add color and decor to your kitchen without spending much money. To start, you’ll need bottle caps, a hot glue gun, and some solid adhesive magnets.
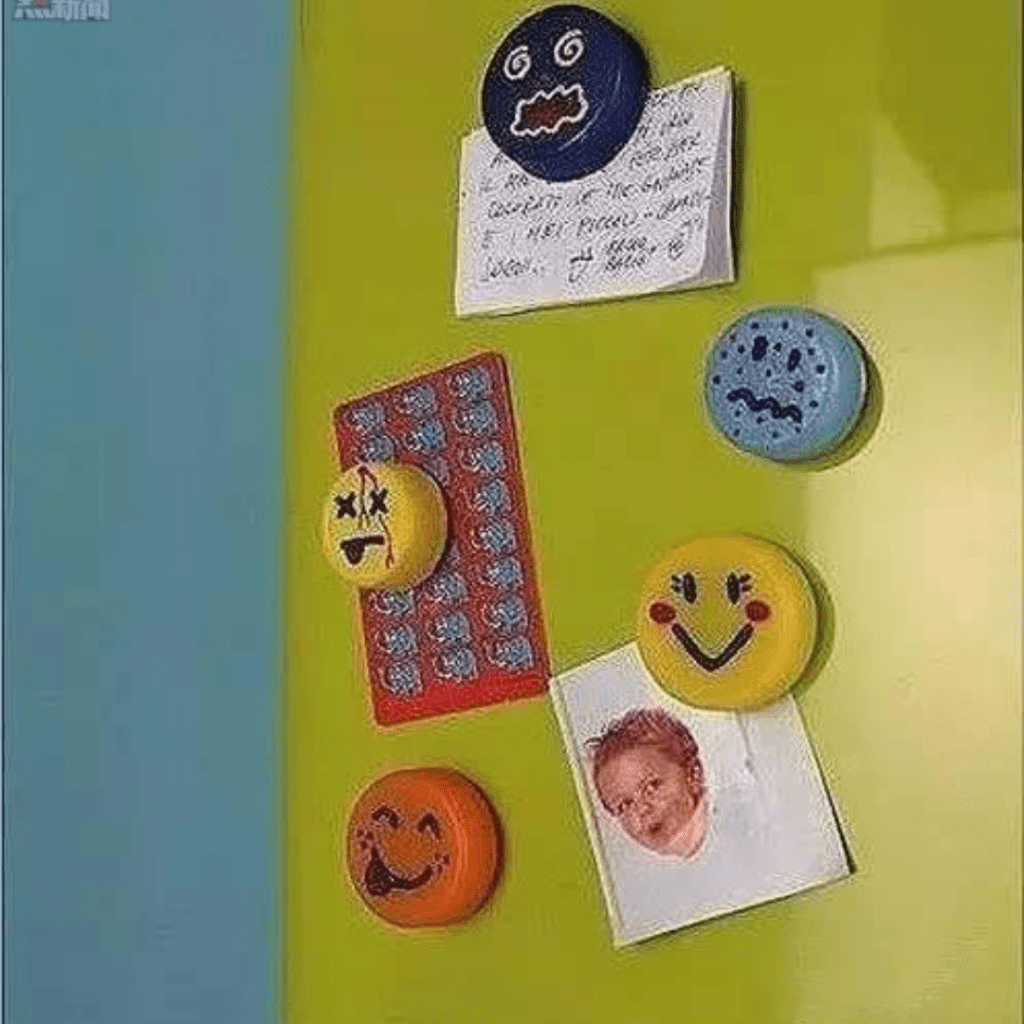
To assemble the pieces, simply use the glue gun to attach the magnet to one side of the bottle cap. Once it’s thoroughly dried, you can get creative by painting designs, words, or pictures with acrylic paint—just let your imagination run wild!
Protection for tables
If you’re looking for a fun and creative way to protect your table from water rings, look no further than old bottle caps! All you need are some clean bottle caps—we recommend plastic—and glue. You can make them uniform colors or go wild and randomize it.
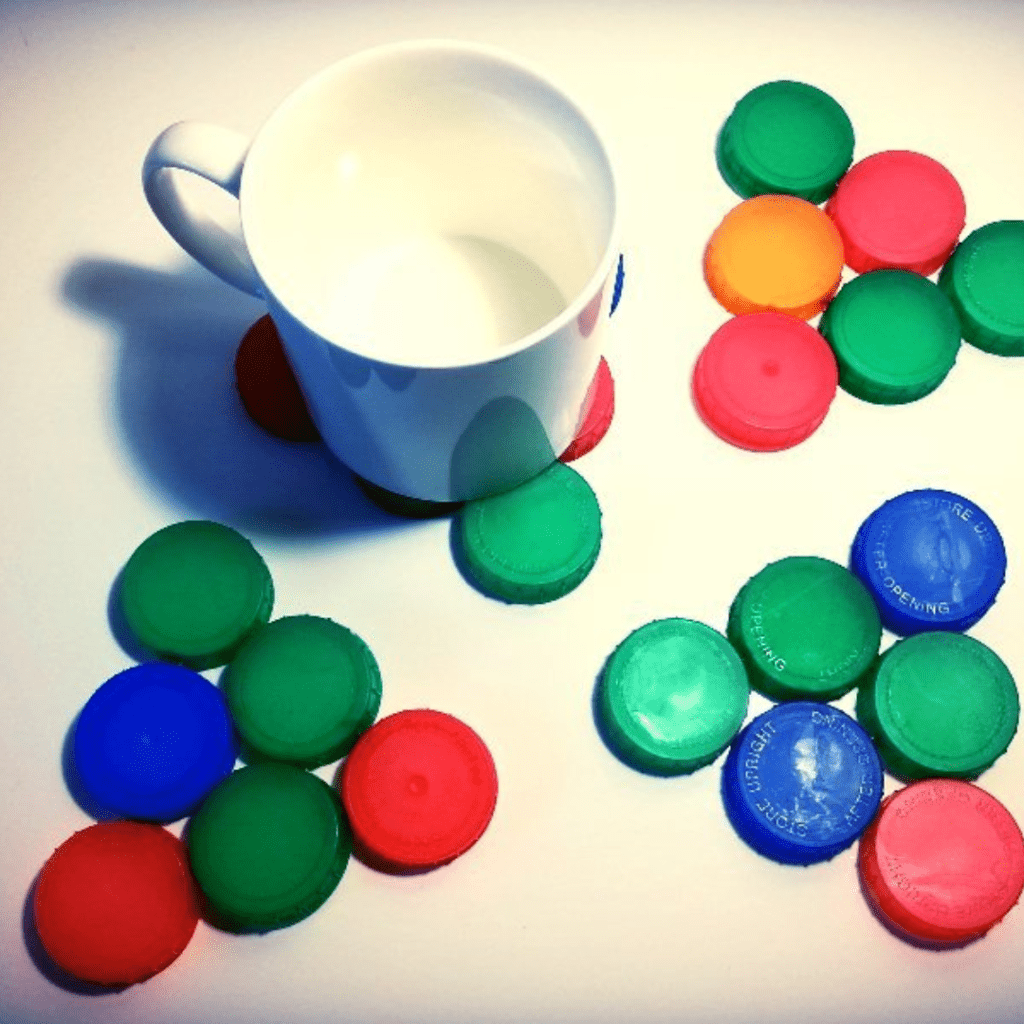
Glue the caps together to create your coaster. This craft is flexible and fun, since you can make the coasters in any shape you want. Circle, triangle, abstract—you name it! Just make sure to smooth out the bottom edges so you don’t scratch your table.
Rainbow gradient design
This is an easy yet eye-catching way to create something one-of-a-kind without spending much money. All you need are some plain canvas, paint, and bottle caps. Begin by painting a layer of white primer onto your canvas so that the colors will appear more vibrant and last longer.
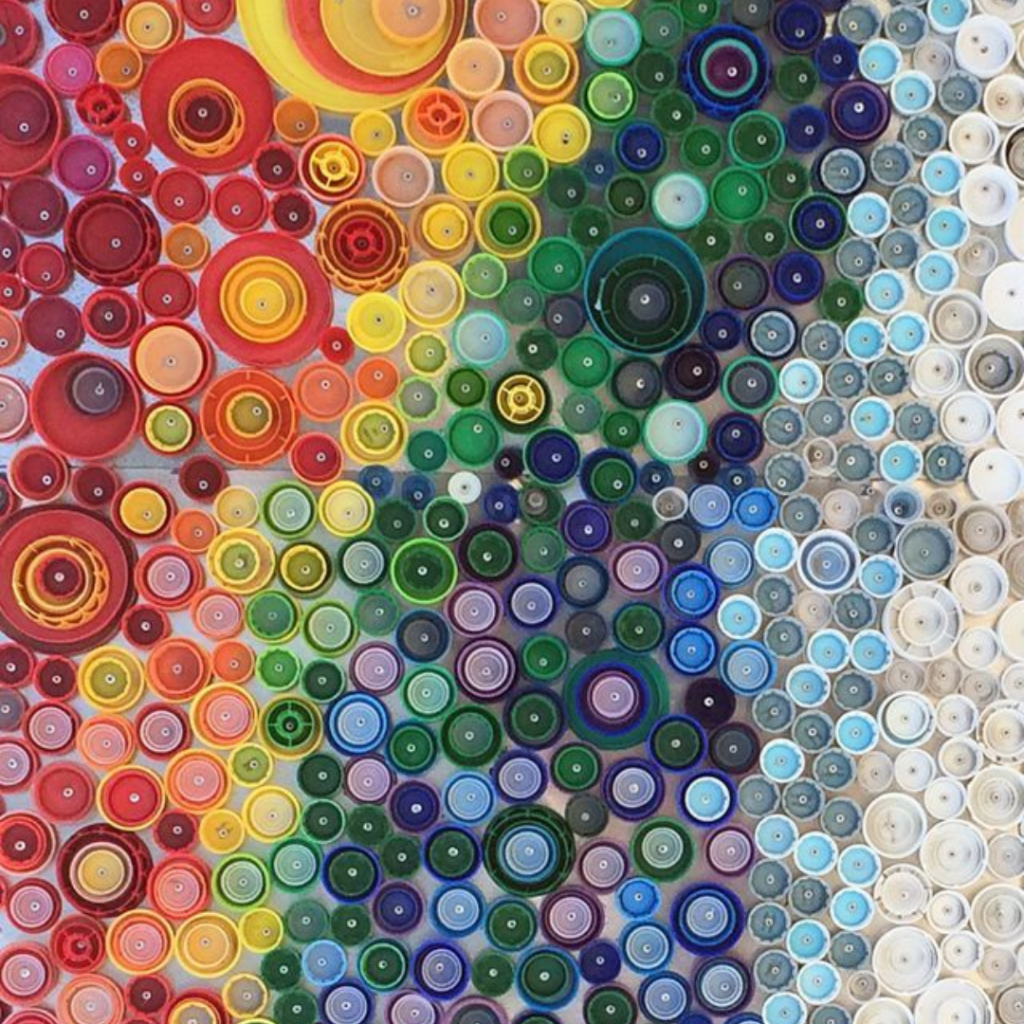
Now it’s time for the fun part—adding those rainbow hues! Make sure to coat them up nicely to create a full gradient. You can double-layer the caps by nestling smaller ones inside bigger caps. This is especially useful when transitioning between colors.
